Disclosure: This post may contain affiliate links. If you click and buy, we may earn a commission at no extra cost to you. As an Amazon Associate, we earn from qualifying purchases.
I’m always a little surprised by how many people, including working florists, skip proper flower processing or don’t know the right sequence. It’s the first thing I teach anyone who comes to work in my shop. Doesn’t matter if they’ve never touched a flower before or if they’ve been arranging for years. Everyone starts here.
The reason is simple: everything else you do with a flower depends on this foundation. You can buy the most beautiful roses in the world, put them in the most elegant vase, and use the best preservative on the market, and if the stems weren’t processed correctly when you got them, you’ve already lost days of vase life before you’ve even started.
So let’s go through it properly.
Start with the Right Tools
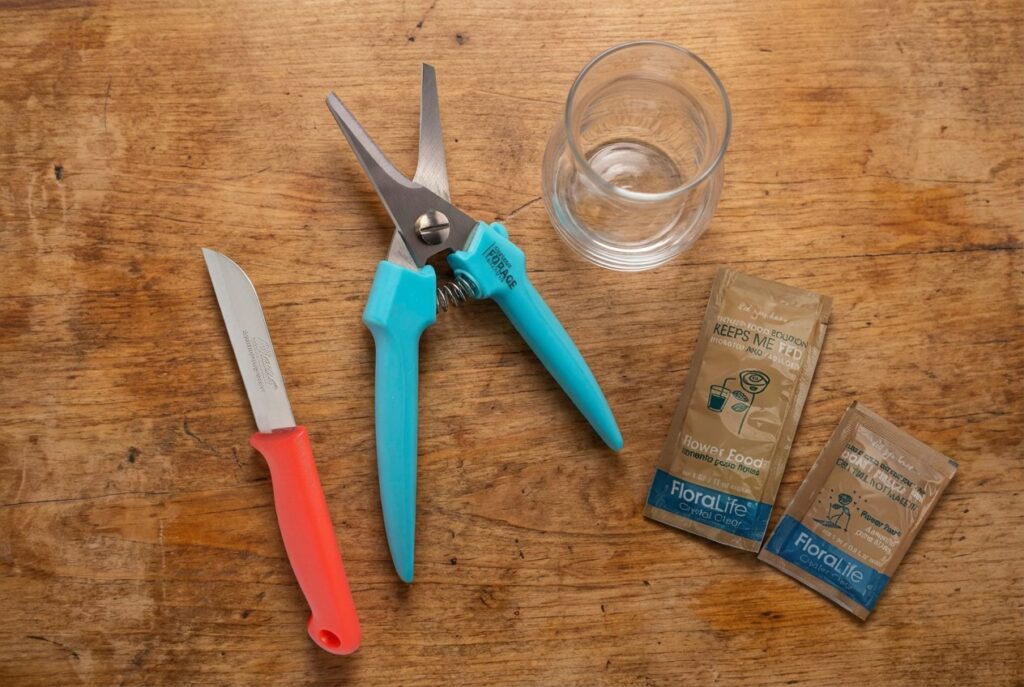
Before we talk about steps, make sure you have what you need on hand. Using the wrong tools when processing flowers slows everything down and produces worse results.
What you’ll need:
- A sharp floral knife - for clean stem cuts without crushing the vascular tissue
- Fresh flower shears or a bunch cutter - for high-volume cutting during processing
- Clean buckets - one for each flower variety if possible; bacteria from mixed buckets shortens vase life
- Commercial floral preservative - Floralife is what we use in the shop; don’t skip this step
- Floralife Quick Dip - a stem hydration solution that helps flowers take up water immediately after cutting
- Room-temperature or slightly warm water - cold water slows hydration; aim for around 100°F for most varieties
Have everything prepped before your flowers arrive or before you cut from the garden. Speed matters at this stage. The window between cutting and getting stems into water is short, and every minute counts.
Step 1: Unpack and Inspect Immediately
The moment your flowers arrive, whether from a wholesaler, an online order, or your own garden, unpack them right away. Flowers left in boxes or wrapped suffer from heat, ethylene gas buildup, and dehydration. Don’t set the box aside and come back to it later.
As you unpack, inspect each stem. Look for:
- Bent or broken stems
- Petals showing signs of bruising or browning
- Any sliminess or bacterial odor on the stem ends
- Flowers that have opened more than expected in transit
Separate any damaged stems for immediate attention. Most can be salvaged with proper processing, but the longer you wait, the harder recovery becomes.
Step 2: Remove Packaging, Sleeves, and Guards
Strip away any plastic sleeves, netting, or protective wrapping. For roses, carefully remove the guard petals - the outer petals that often look slightly bruised or irregular. Guard petals protect the flower in transit, but should come off before processing. They’re not a sign of poor quality; they’re doing their job.
Don’t remove more petals than necessary. One or two outer guards per bloom is typically enough.
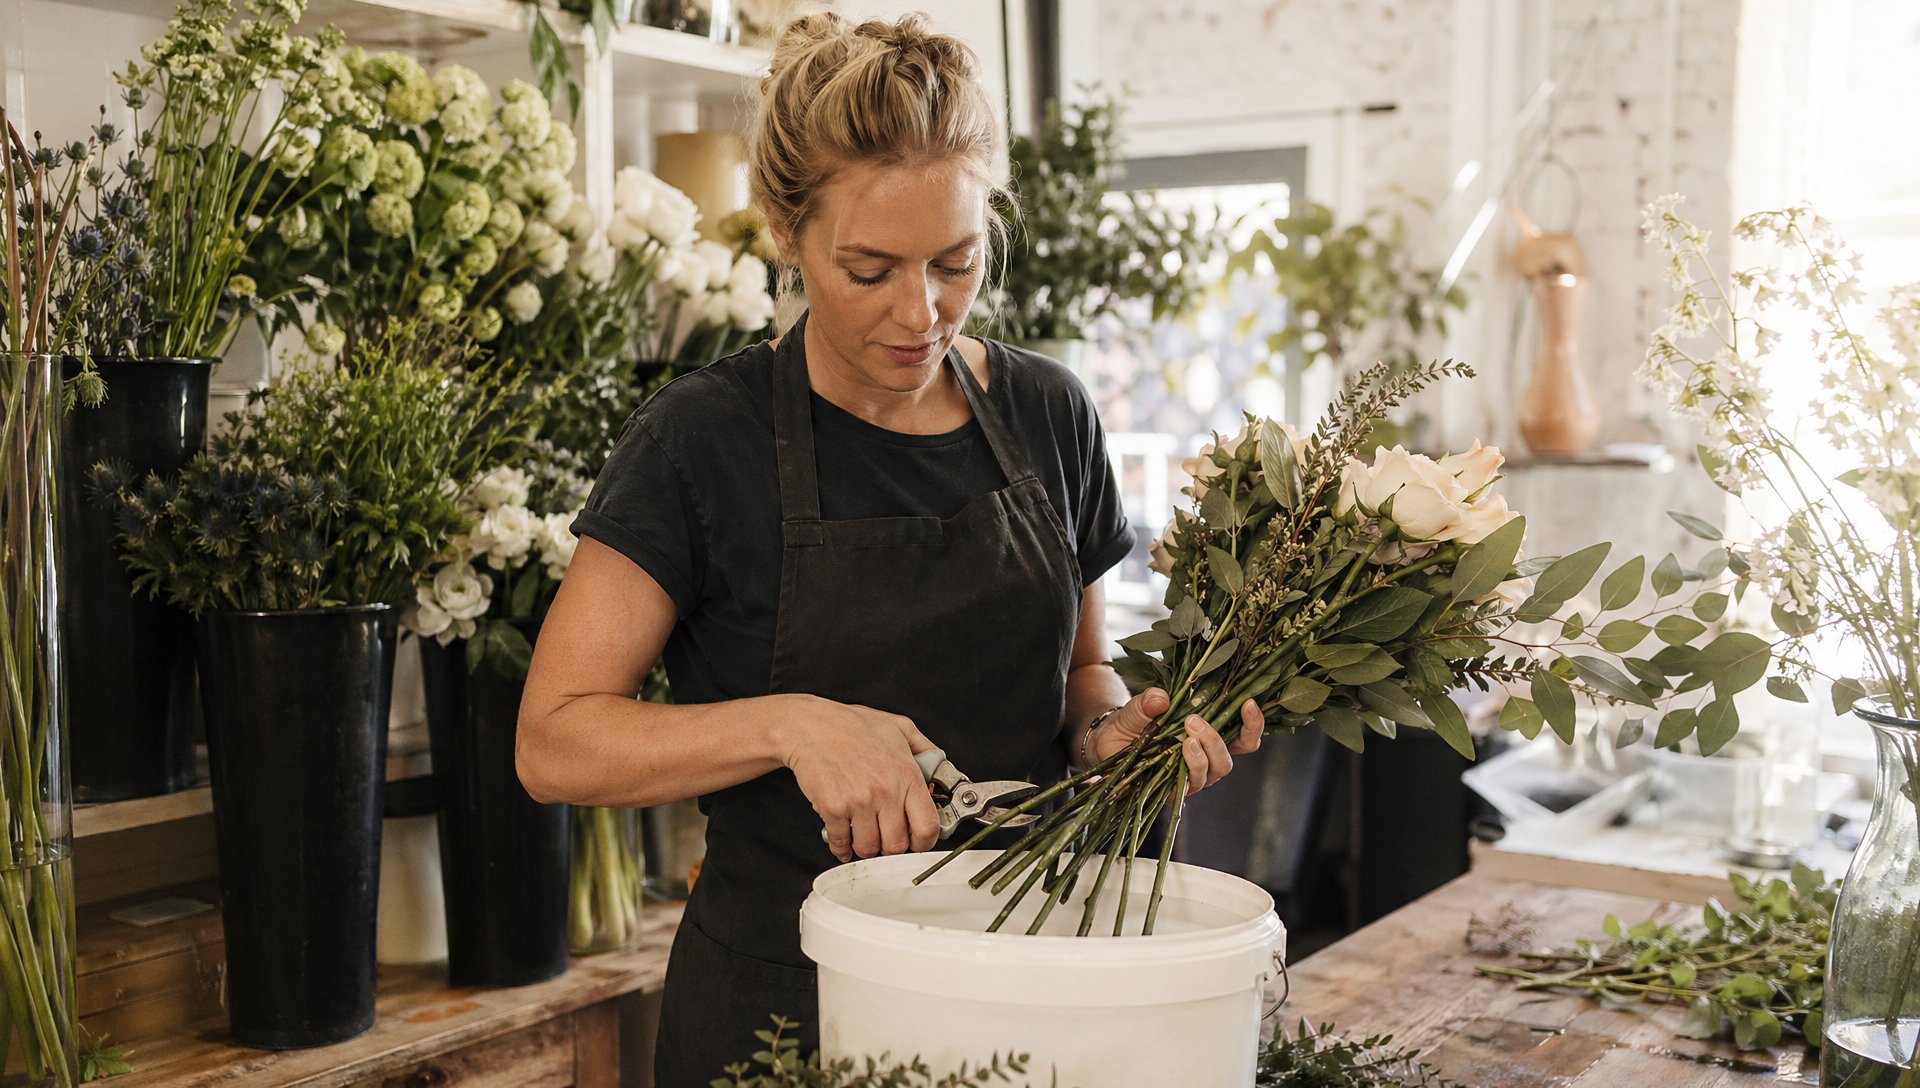
Step 3: Strip Foliage Below the Water Line
Any leaves, foliage, or thorns that will sit below the water line in your bucket need to come off now. This is not optional. Submerged foliage rots quickly and introduces bacteria into the water, which clogs the stem’s vascular system and dramatically shortens vase life.
Use a floral thorn stripper for roses. For other flowers, strip foliage by hand - working from the bottom of the stem upward. Leave the foliage above the waterline intact; it’s doing useful work there.
If you have sensitive skin, wear garden gloves. Repeated exposure to some foliage and rose thorns can cause a skin reaction that builds over time. I’ve seen it happen more than once to people who thought they were immune.
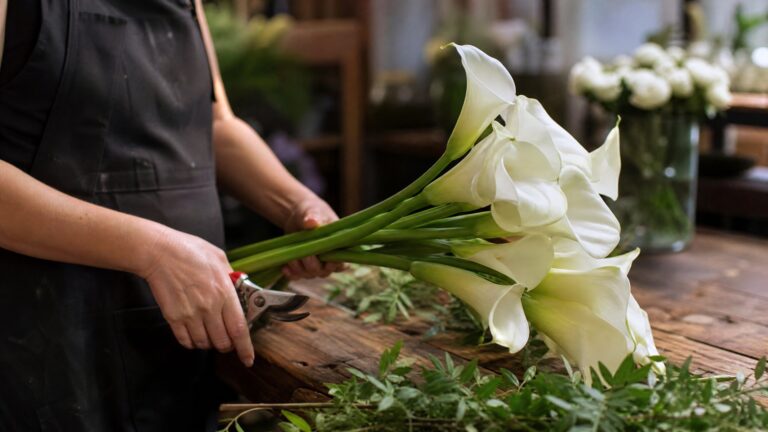
Step 4: Cut Stems the Right Way
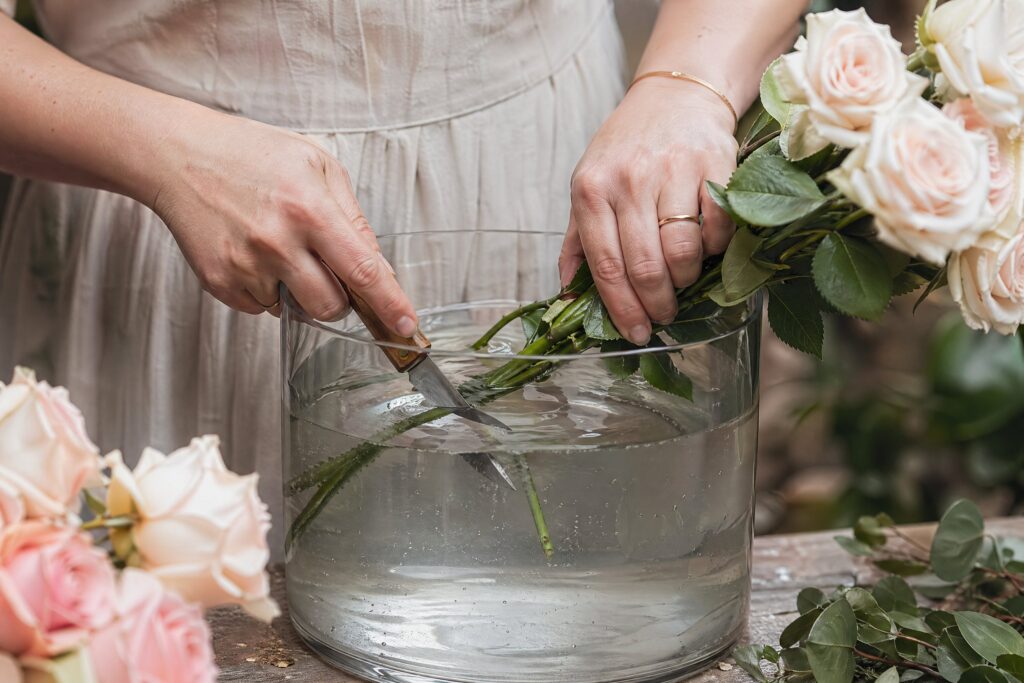
This is the most critical mechanical step. A proper stem cut makes the difference between a flower that drinks well and one that struggles to hydrate.
Here’s exactly how to do it:
Cut at a 45-degree angle - this increases the surface area available for water uptake and prevents the stem from sitting flat against the bottom of the bucket, which would block absorption.
Cut at least 1 to 2 inches off the stem - you’re removing the section that has been exposed to air and has already begun to seal itself. Fresh cut, fresh uptake.
Use a sharp blade - a floral knife produces a cleaner cut than scissors on most stems. A dull blade crushes vascular tissue rather than slicing it cleanly. It impairs water absorption even if the cut looks acceptable.
Cut underwater whenever possible - particularly for hollow-stemmed flowers like gerbera daisies and delphinium, which are prone to air lock. Holding the stem under running water or in a bucket while cutting prevents air from entering the stem immediately after cutting.
For very woody or thick stems, such as lilacs, viburnum, and flowering branches, make a vertical slit about an inch up the stem after the angled cut. This increases surface area and helps woody material take up water more efficiently.
Step 5: Use Quick Dip Before Water
This step gets skipped constantly, and it shouldn’t.
Floralife Quick Dip is a stem-dipping solution that you apply immediately after cutting, within seconds of making the cut. You dip the freshly cut stem end into the solution before placing it in water. It works by instantly treating the stem opening to facilitate rapid water uptake.
It’s particularly important for flowers with hollow stems (gerberas, delphiniums) and for any flower that has traveled a long distance and may show some degree of dehydration on arrival. Don’t let the cut end dry out between cutting and dipping, that’s when air enters, and hydration gets compromised.
Step 6: Place Immediately in Prepared Water
Have your buckets ready before you start cutting. Fill them with clean water at approximately 100°F mixed with commercial floral preservative according to the package instructions.
Don’t improvise the preservative concentration. Too little and you’re not getting the antibacterial and nutritional benefits. Too much can damage the flowers. Follow the directions.
In the shop, we use Floralife flower food - the liquid version, though the powder works equally well. We buy by the gallon and mix into buckets as needed.
Place stems into the prepared buckets immediately after the Quick Dip step. Don’t let them sit on the table, don’t let them air-dry. Stem to bucket as fast as you can move.
Step 7: Let Them Condition - This Part Takes Time
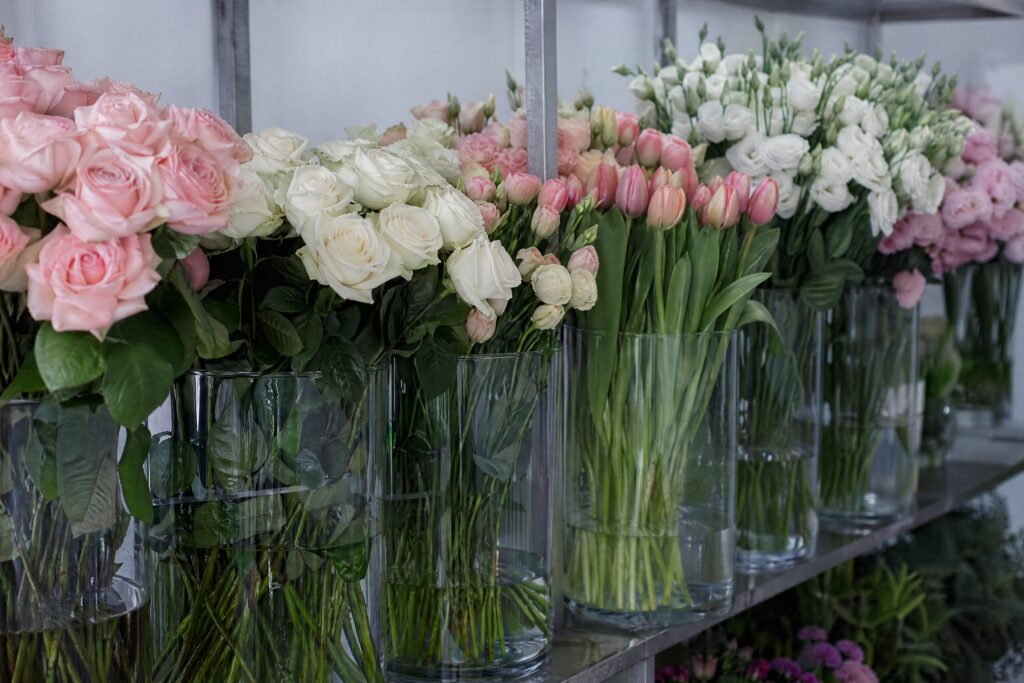
Once your stems are in the prepared water, the conditioning period begins. This is where flowers rehydrate fully and stabilize before they go into arrangements.
Give them at least 2 to 4 hours - ideally longer. Overnight conditioning for flowers that will be used in event work is common practice in my shop. Well-conditioned flowers hold up significantly longer in finished arrangements than flowers that were processed and immediately arranged.
During conditioning, keep flowers in a cool location away from direct sunlight, heating vents, air-conditioning drafts, and ripening fruit. Ethylene gas from ripening fruit is a real accelerant of flower decline that most people don’t think about.
Don’t arrange flowers while they’re still stressed from transit. Let them rest. You’ll see them visibly improve, heads lifting, petals firming, and color brightening, as they rehydrate.
Step 8: Maintain Water Quality Daily
Processing isn’t a one-time event. Proper flower care is an ongoing practice.
- Check water levels daily and top up with fresh preservative solution
- Change the water entirely every 2 to 3 days, recutting stems at the same time
- Keep containers squeaky clean. Bacteria accumulate quickly in the water and are the primary cause of early wilting
- Remove any flowers that are declining before they contaminate the water for the rest
This is where most people lose flowers they should have kept. The processing was fine; the follow-through wasn’t.
The Refrigeration Question - Let’s Clear This Up
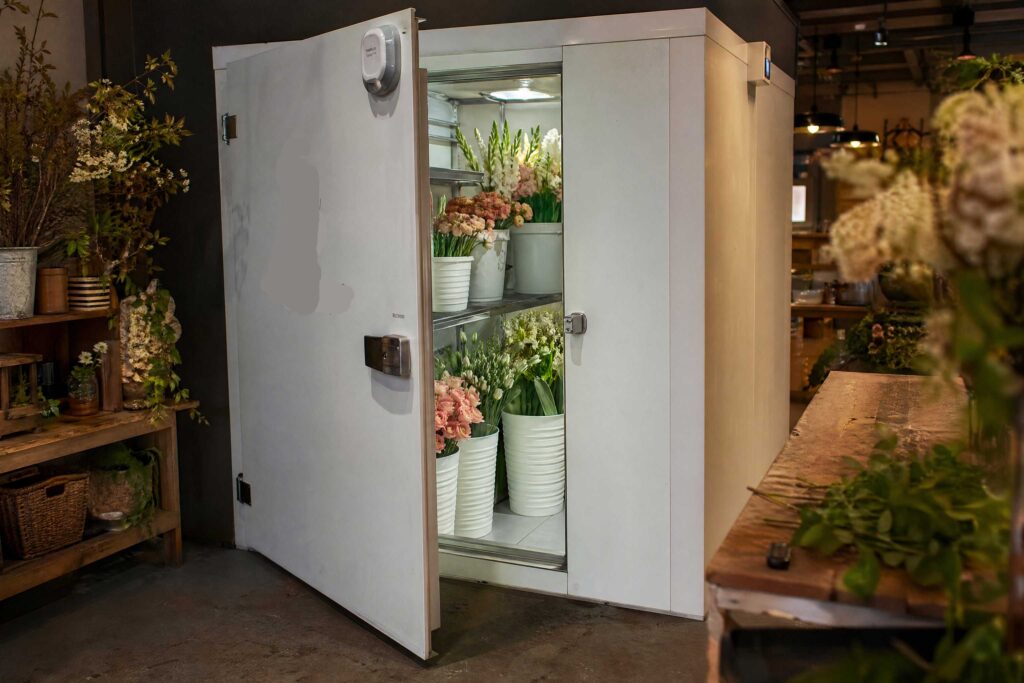
The original version of this article touched on this, and it’s worth addressing directly because the misconception is widespread.
Refrigerating flowers does not significantly extend vase life. What it does is slow the opening process, which is useful in specific situations, like holding corsages or slowing blooms that have opened ahead of schedule. But refrigeration is not a substitute for proper processing and hydration.
In my 40+ years running a shop, I’ve watched plenty of florists rely on the cooler when they should have been focusing on proper conditioning. The cooler is a tool. Processing is the foundation.
If you don’t have a cooler, don’t worry about it. Properly processed and conditioned flowers held in a cool room away from sunlight will perform well. The two-step rule I’ve always given people stands: buy fresh, process immediately. Everything else is secondary.
What You’ll Need - Shopping List
| Item | My Pick |
|---|---|
| Floral knife | Victorinox Floral Knife |
| Flower shears | Oasis Bunch Cutter |
| Stem dipping solution | Floralife Quick Dip |
| Floral preservative | Floralife Flower Food |
| Thorn stripper | Floral Thorn Stripper |
| Finishing spray (wearables) | Chrysal Professional Glory |
| Finishing spray (arrangements) | Floralife Finishing Touch |
Frequently Asked Questions
How soon after buying flowers should I process them?
Immediately. Don’t set them on the counter and come back in an hour. Every minute between purchase and proper processing costs you vase-life. Have your tools and buckets ready before the flowers arrive.
Do I need to cut flower stems underwater?
For most flowers, it’s ideal, and for hollow-stemmed varieties like gerbera daisies and delphiniums, it’s essential. Cutting underwater prevents air from entering the stem immediately after the cut, which can block water uptake. At a minimum, move from cut to water as fast as possible.
What angle should I cut flower stems?
45 degrees. This increases the surface area for water absorption and prevents the stem end from sitting flat against the bottom of the bucket, which would restrict uptake.
How long should flowers be conditioned before I arrange them?
At least 2 to 4 hours in properly prepared water. For event and wedding work, overnight conditioning is standard practice. Flowers that have been conditioned properly hold up significantly longer in finished arrangements.
Do I need a commercial flower preservative, or can I use the DIY recipe?
Commercial preservative, Floralife or an equivalent, consistently outperforms DIY alternatives like lemon juice, sugar, and bleach. The DIY versions are better than nothing in an emergency, but they don’t match the antibacterial and nutritional performance of a good commercial product. If you’re buying flowers, use the commercial solution.
Do cut flowers need to be refrigerated?
No, not as a standard practice. Refrigeration slows flower opening, which is useful in specific situations, but it doesn’t significantly extend vase life and is not a substitute for proper processing. Properly processed flowers held in a cool room away from sunlight will perform well without a cooler.
Can I process garden-cut flowers the same way as purchased flowers?
Yes, with one addition: cut garden flowers in the early morning or evening when temperatures are lower, and the plant is less stressed. Bring your bucket of prepared water to the garden and place stems in immediately after cutting. The steps from there are identical to processing purchased flowers.
What kills cut flowers fastest?
Bacteria in the water are the primary culprit, which is why clean tools, clean containers, and fresh preservative solution matter so much. Second is an air lock from improper cutting. Third is heat and direct sunlight post-processing. Address all three, and your flowers will consistently outlast what most people expect.
Proper processing takes maybe fifteen minutes the first time you really do it right. After that, it becomes instinct. You stop thinking about each step and move through them. The flowers will tell you when you’re doing it correctly. They’ll hold their heads up, drink steadily, and bloom on your schedule rather than their own.
That’s the whole point of getting this right.
Til next time,