Disclosure: This post may contain affiliate links. If you click and buy, we may earn a commission at no extra cost to you. As an Amazon Associate, we earn from qualifying purchases.
Last Updated: May 5, 2026
A customer came into the shop last week holding a bunch of irises that had barely been open 48 hours. She was frustrated - and honestly, I didn’t blame her. She’d spent good money on them, followed the care instructions that came with the flowers, and they still flopped early.
When I asked a few questions, I found the culprit pretty fast: she’d been keeping them next to a sunny window. Problem solved. But it got me thinking - iris care is one of those things that seems obvious until it isn’t.
We sell a lot of Dutch iris in our shop, especially during the spring season. Dutch irises are bulb flowers available year-round, but peak from January to May. Their beautiful color and unique flower shape make them a favorite among our customers.
Most people are familiar with the striking dark blue iris, but these flowers also come in light blue, yellow, white, purple, and bronze - and all of them respond to the same basic care.
I’m going to walk you through exactly what we do in the shop to get the most out of cut iris. Follow these steps, and you’ll get significantly more vase life out of every bunch.
Buy Them at the Right Stage

This is where vase life is won or lost before you even get home. For maximum vase life, purchase irises in the bud stage, with just the tips showing color. If the flowers are already open when you buy them, you’ve already burned through a big chunk of their lifespan. In the shop, I always coach customers on this. It’s one of those small details that makes a huge difference.
Whether you receive irises as a gift or buy them to enjoy yourself, they’ll arrive either arranged, boxed, or wrapped. If they’re not already in water, you want to move through the next steps quickly.
Follow These Seven Steps - Right Away
Timing matters here. The sooner you process your irises after bringing them home, the better. These steps take about ten minutes, and they’re worth every one of them.
- Strip the foliage. Remove any damaged leaves and any foliage that will sit underwater. Leaves below the waterline rot quickly and create bacterial buildup that dramatically shortens vase life.
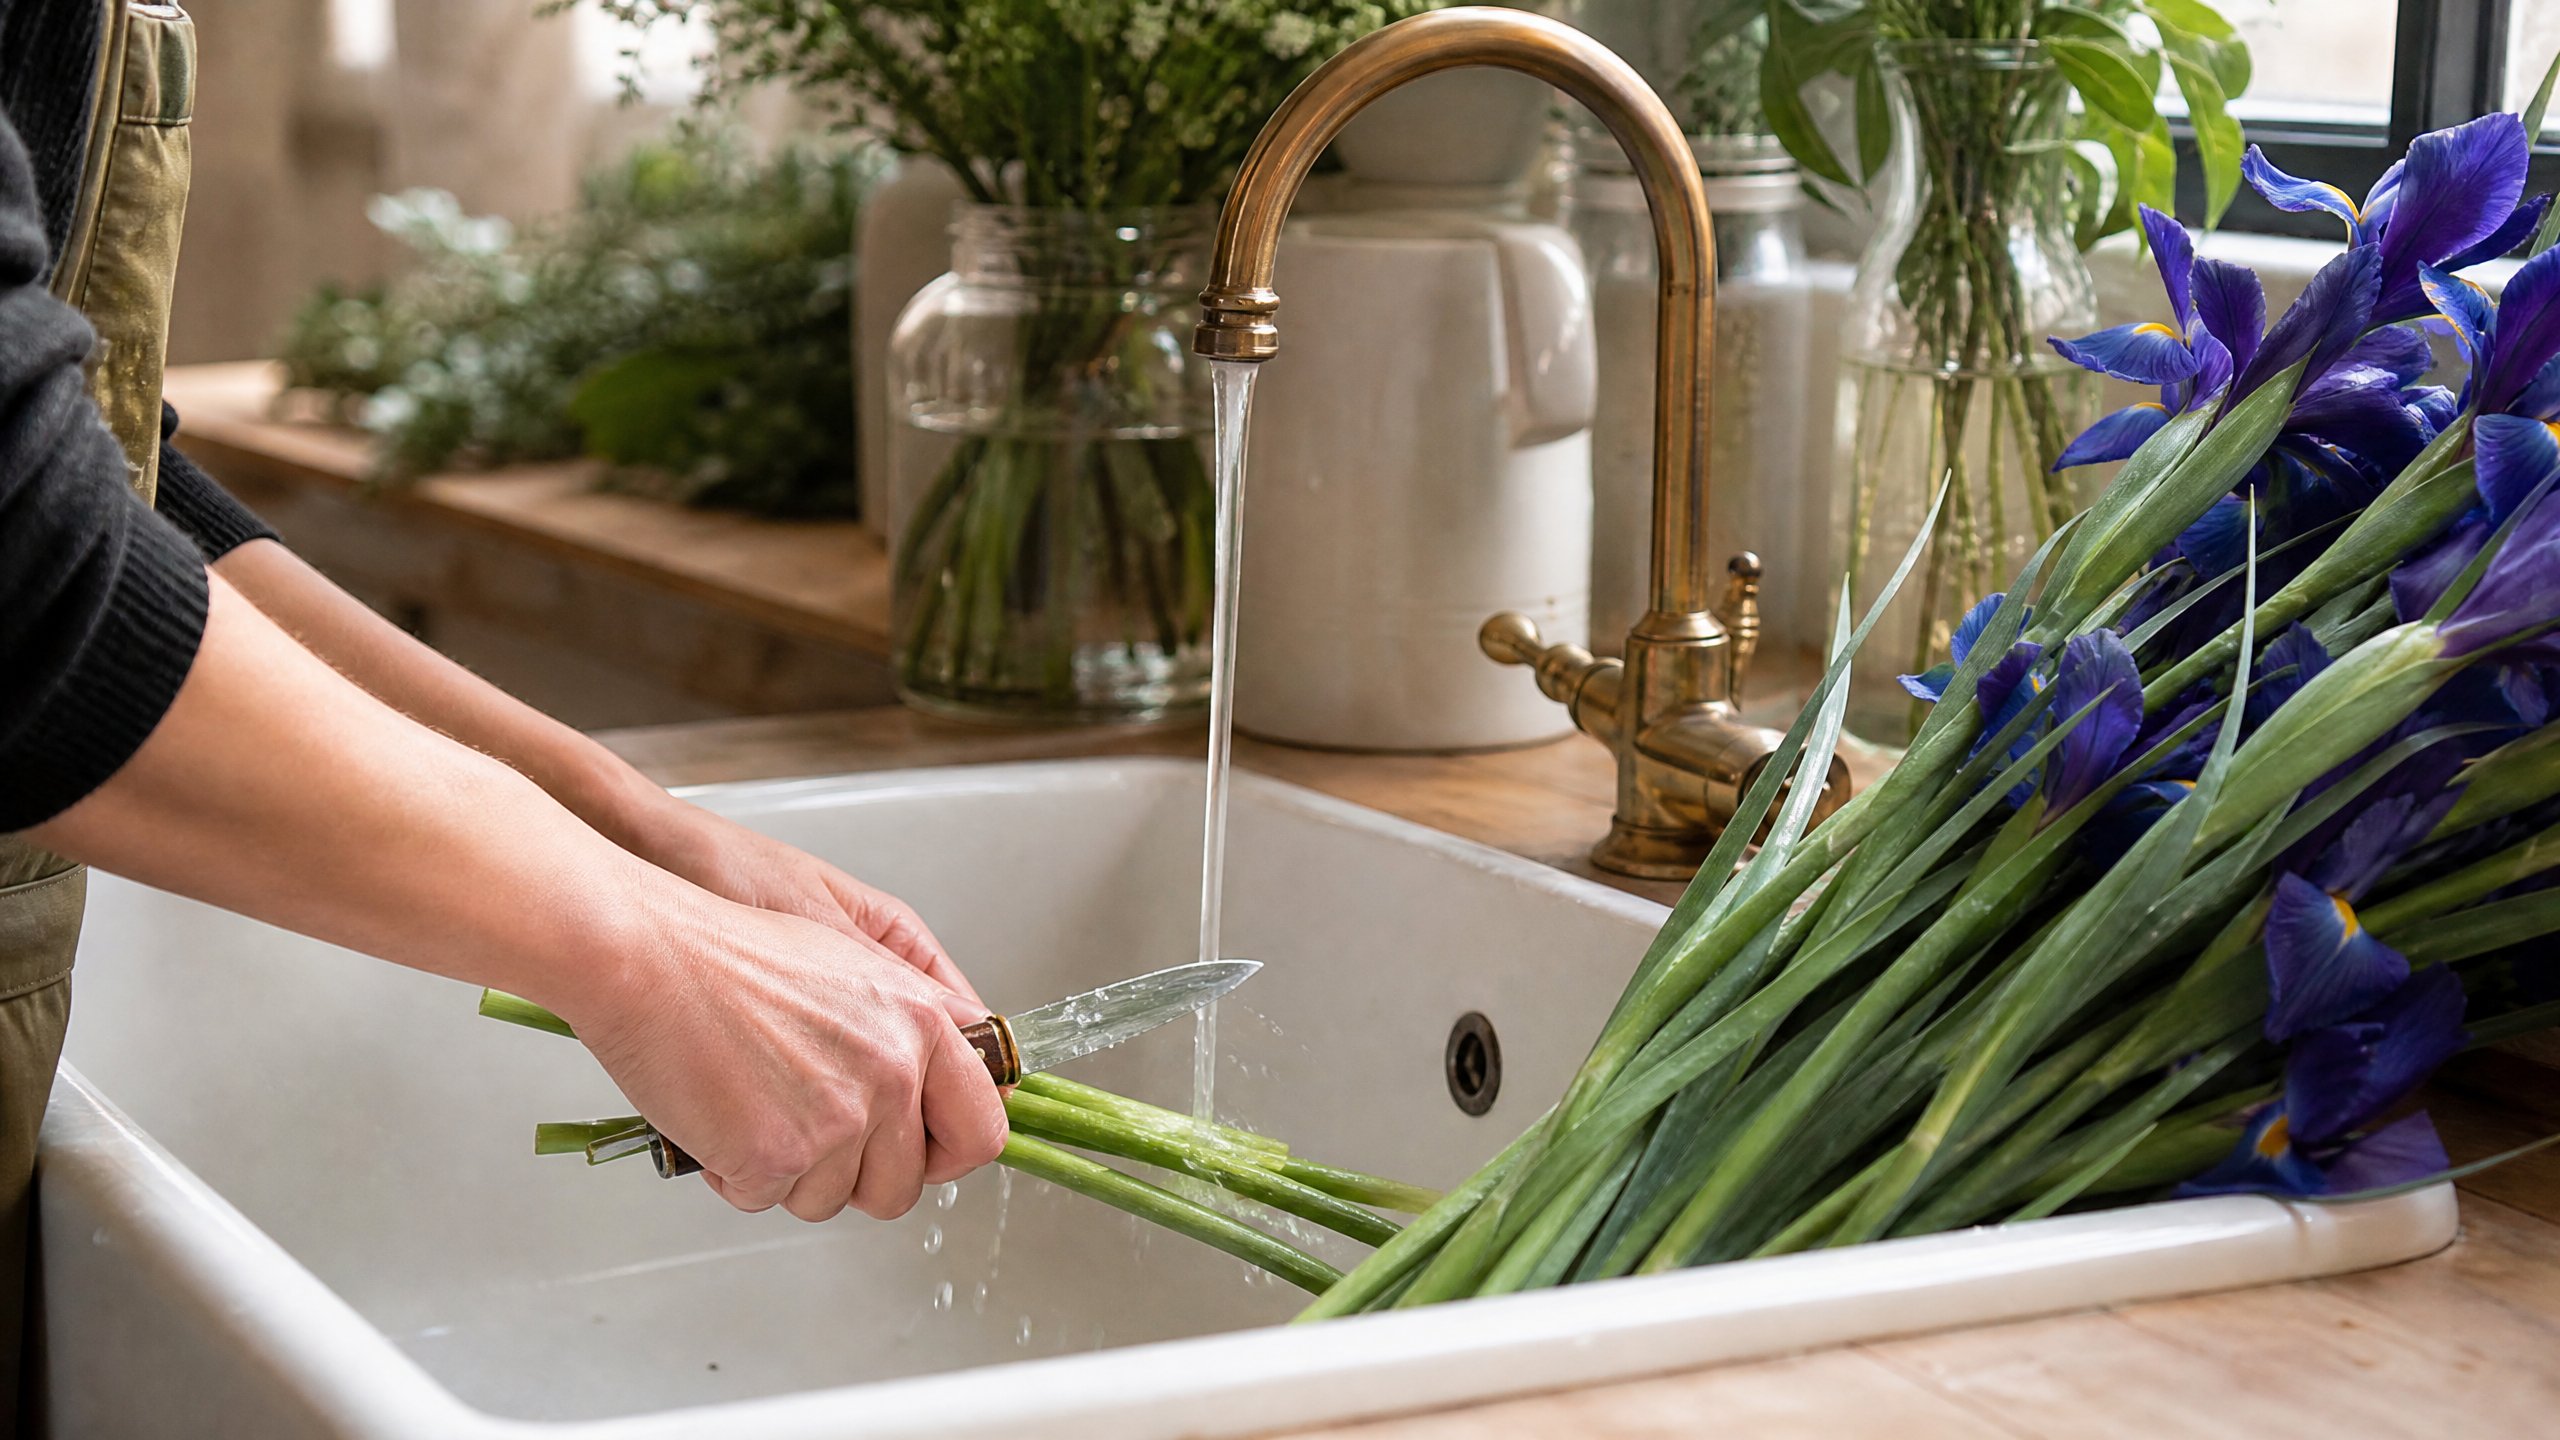
- Recut the stems - underwater. While holding the stems underwater in a sink, or under running water, cut about an inch off each stem with a sharp knife (not a serrated blade) or shears, at a 45-degree angle. Do not let the freshly cut end dry off before placing it in water. Even a few seconds of air exposure can block water uptake.
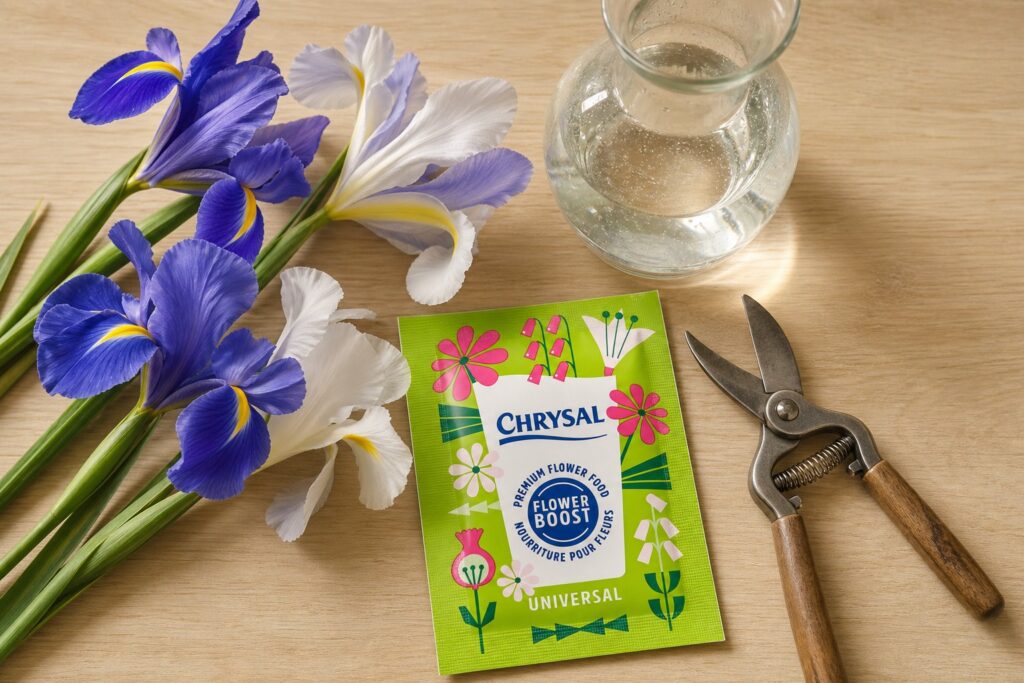
- Use lukewarm water with flower food. Lukewarm water - around 100°F - is the sweet spot for fresh-cut iris. Add a quality commercial flower preservative mixed at the recommended ratio. What I use in the shop: Chrysal Professional Flower Food - it feeds the blooms and keeps bacterial growth in check. Homemade preservative solutions can work in a pinch, but I don’t recommend them for iris. Skip water from a water softener entirely. The sodium interferes with uptake.
- Condition them before arranging. Leave your irises in a cool, dark room or refrigerator to “condition” for 2 to 3 hours after processing. I know it’s tempting to arrange them right away, but this rest period lets the stems hydrate fully before they go on display.
- Handle the buds carefully. If your irises arrive boxed or wrapped, be gentle when unpacking. Do not bump the tips of the buds. Iris blooms bruise easily at the tips, and that damage shows up fast once they open.
- Keep them cool and out of drafts. Temperature is everything for iris. Display them away from direct sunlight, heating vents, and cold drafts. A slightly cool room noticeably extends vase life. This also applies to where you store them overnight.
- Check the water level daily. Irises are thirsty. Check your vase water every single day and top it off as needed. If you’ve arranged them in floral foam, make sure the foam stays completely saturated and that the container has fresh water daily. Dry foam is the fastest way to lose your blooms early. For a deeper look at how professional flower processing works, that post covers the full sequence we use in the shop.
What to Do If Your Irises Won’t Open

This comes up all the time. You bring home beautiful buds, follow all the steps, and they just… sit there. Closed. Stubborn. I get questions about this constantly, so here’s a quick tip that helps: warm water and a warm room will encourage irises to open faster. A short spell at room temperature, rather than a cool display spot, can get reluctant buds moving.
This short video clip shows exactly what to do with cut irises that won’t open:
Once they open, move them back to a cooler spot to extend their vase life.
The Right Tools Make a Difference
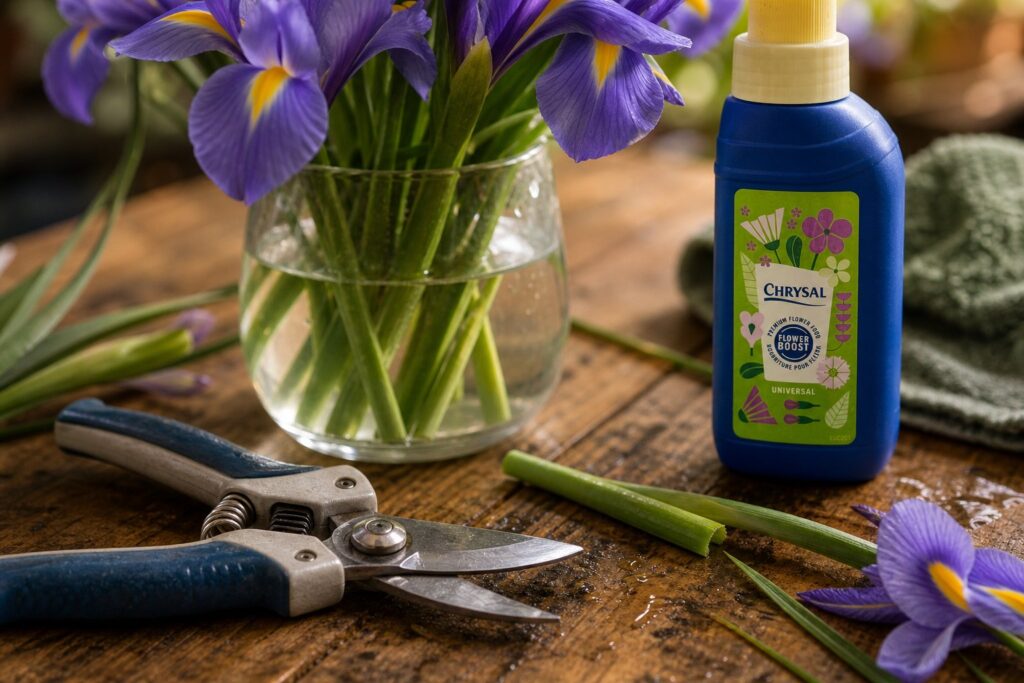
You don’t need a ton of equipment to care for cut irises, but a couple of things genuinely matter. A clean, sharp pair of shears makes a clean cut without crushing the stem. A dull blade or a serrated knife mashes the stem tissue and reduces water uptake, which is exactly the opposite of what you want.
What I use in the shop: Dramm Colorpoint Floral Shears - comfortable, precise, and they hold an edge. A clean vase matters too. Rinse it with a dilute bleach solution before you fill it to eliminate any lingering bacteria from previous bouquets.
If you’re caring for a lot of flowers regularly, not just the occasional bunch, it’s also worth reading my post on gerbera daisy care, which covers a lot of the same principles and is one of our most-read care guides.
Frequently Asked Questions About Iris Care
How long do cut irises last in a vase?
With proper care - a clean vase, fresh water, flower food, and a cool display spot - cut irises typically last 5 to 7 days. Buying them in the bud stage gives you the best chance at the full vase life.
Should I cut iris stems at an angle?
Yes. A 45-degree cut maximizes the surface area for water uptake. Always use a sharp, non-serrated blade, and make the cut while the stem is submerged or under running water.
Can I put irises in cold water?
Lukewarm water is better for fresh-cut iris. Cold water slows down water absorption, especially right after processing. Once the flowers are conditioned and on display, a cool room temperature is ideal - but start them in warm water.
Why won’t my irises open?
Most often, it’s a temperature issue. Irises need a bit of warmth to encourage the buds to open. Try moving them to a warmer room temporarily. Once they open, move them back somewhere cool to extend the display.
Can irises be refrigerated?
Yes - briefly. I condition fresh-cut irises in the cooler or a cool, dark room for 2 to 3 hours after processing. Long-term refrigeration isn’t ideal, especially if your fridge holds fruit (ethylene gas from ripening fruit is hard on flowers).
Do irises need flower food?
They really do. A commercial flower preservative gives irises the nutrients they need to open fully and extends their vase life by several days compared to plain water. It also keeps bacteria from building up in the vase water, which is one of the main reasons flowers die early.
How do I keep my iris arrangement looking fresh longer?
Recut the stems every couple of days, change the water, and add fresh flower food. Keep the vase out of direct sunlight and away from heat sources. And, I know this sounds obvious, but check the water level daily. Irises drink more than you’d expect.
Closing Thoughts
Irises are one of those flowers that reward a little extra attention. Follow the steps above, keep that water topped off, and give them a cool spot out of the sun - and they’ll open beautifully and hold for days. Skip the basics, and they’ll let you know pretty quickly.
In my experience, the customers who get the most out of cut flowers are the ones who treat the first hour like it matters. It does. The care you give irises right after bringing them home sets the tone for their entire vase life. Think of it like planting a seed - put in a little effort at the start, and you’ll be rewarded with blooms that carry you all the way to the end of the week.
Have a question about iris care that I didn’t cover here? Drop it in the comments below - I read every one and do my best to answer.
Til next time,
Greg