Disclosure: This post may contain affiliate links. If you click and buy, we may earn a commission at no extra cost to you. As an Amazon Associate, we earn from qualifying purchases.
Last Updated: May 23, 2026
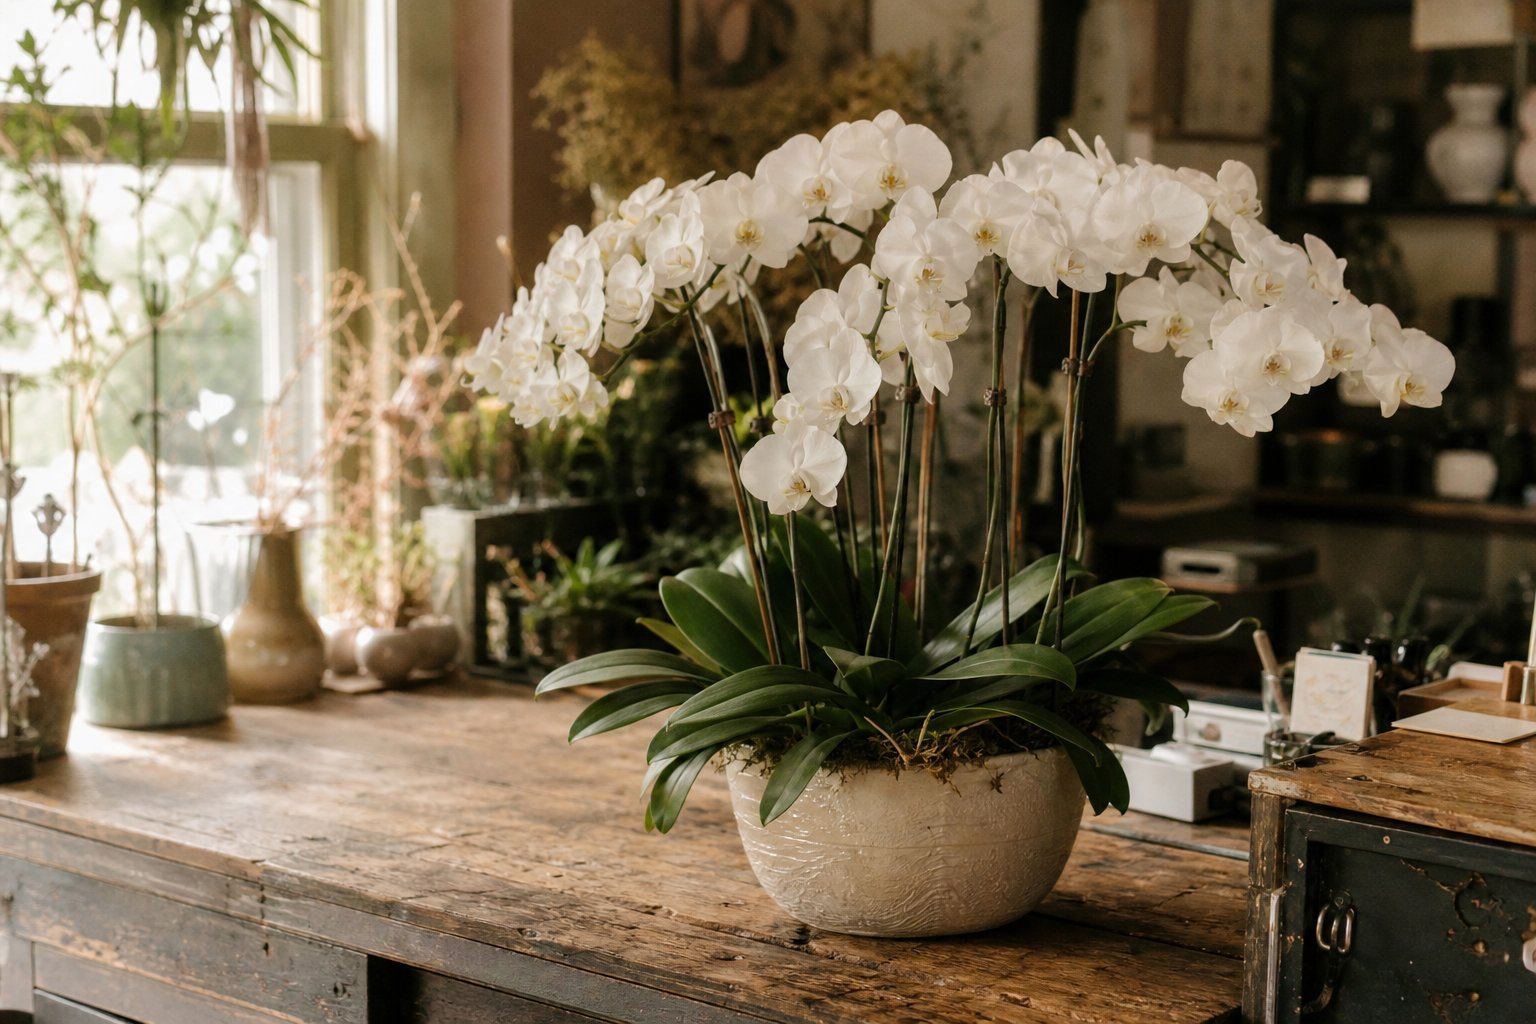
A woman came into the shop last spring carrying an orchid she’d been gifted at Christmas. The leaves looked fine. The bloom spike was bare. She set it on the counter and said, “I don’t know if it’s dead or just resting.”
It was resting. The roots were firm and green, and once we got it into fresh bark and a clear pot, it pushed a new spike about four months later. That’s the whole orchid story in one sentence: most of the plants people think they’ve killed are just waiting for someone to read the signs.
Orchids have a reputation for being fussy. They’re not. They just want different things than the average houseplant, and once you understand what those things are, the care gets pretty automatic. This post walks through the basics for the most common orchid types you’ll see in stores, with the same advice I give customers who buy them from us.
Start With the Right Pot and Mix
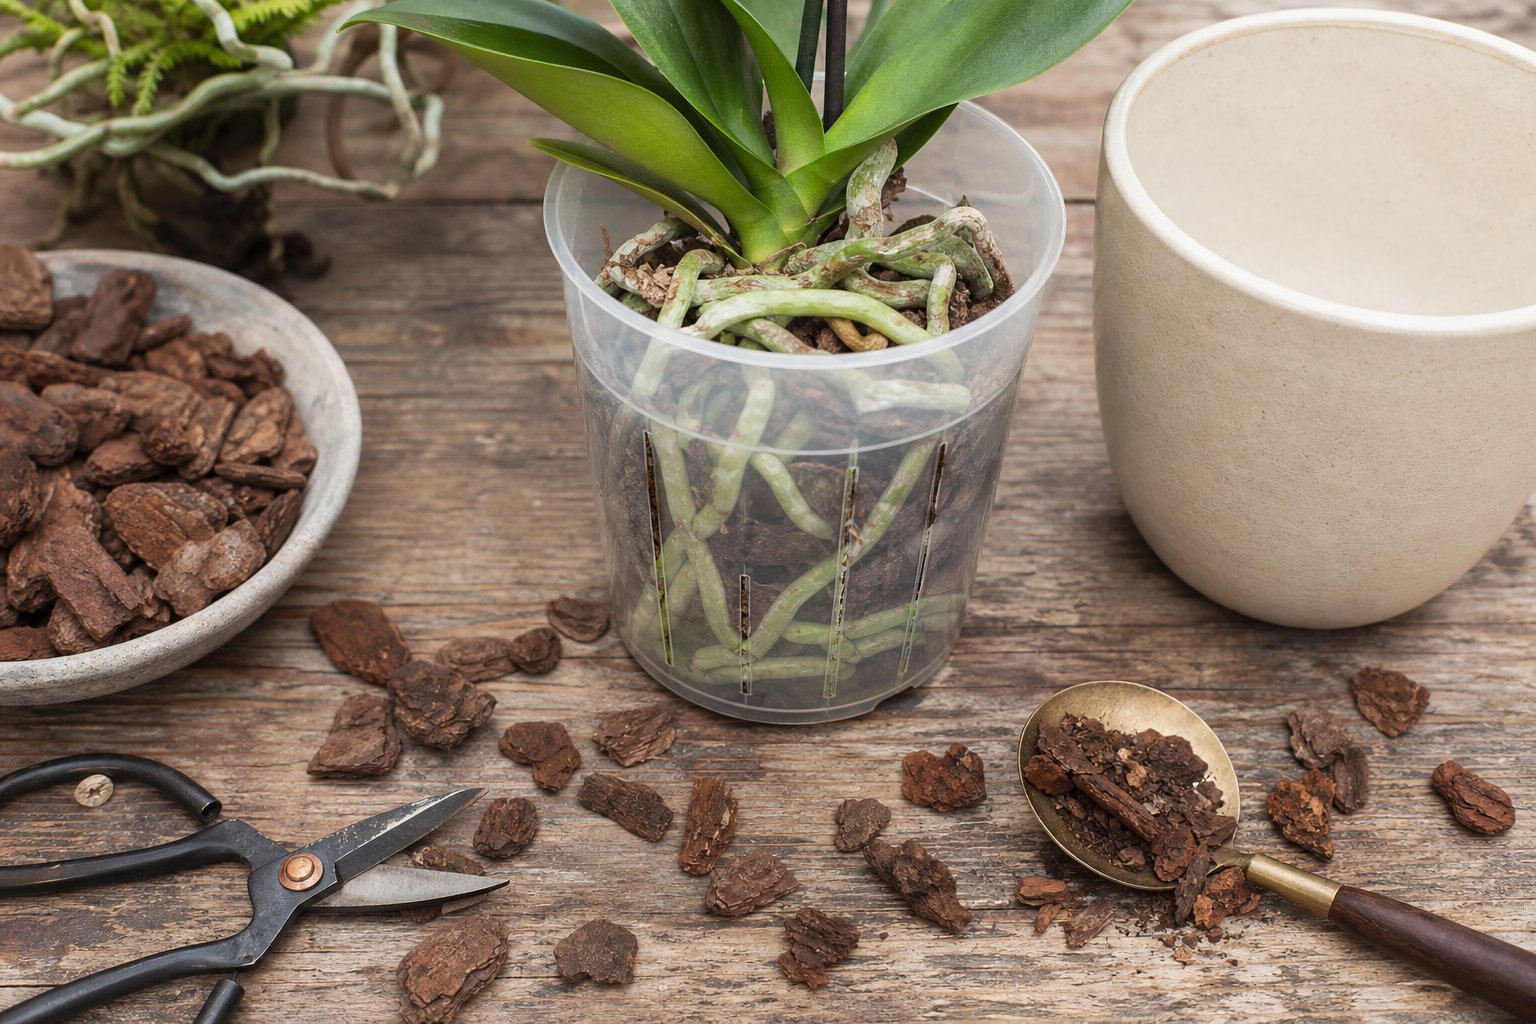
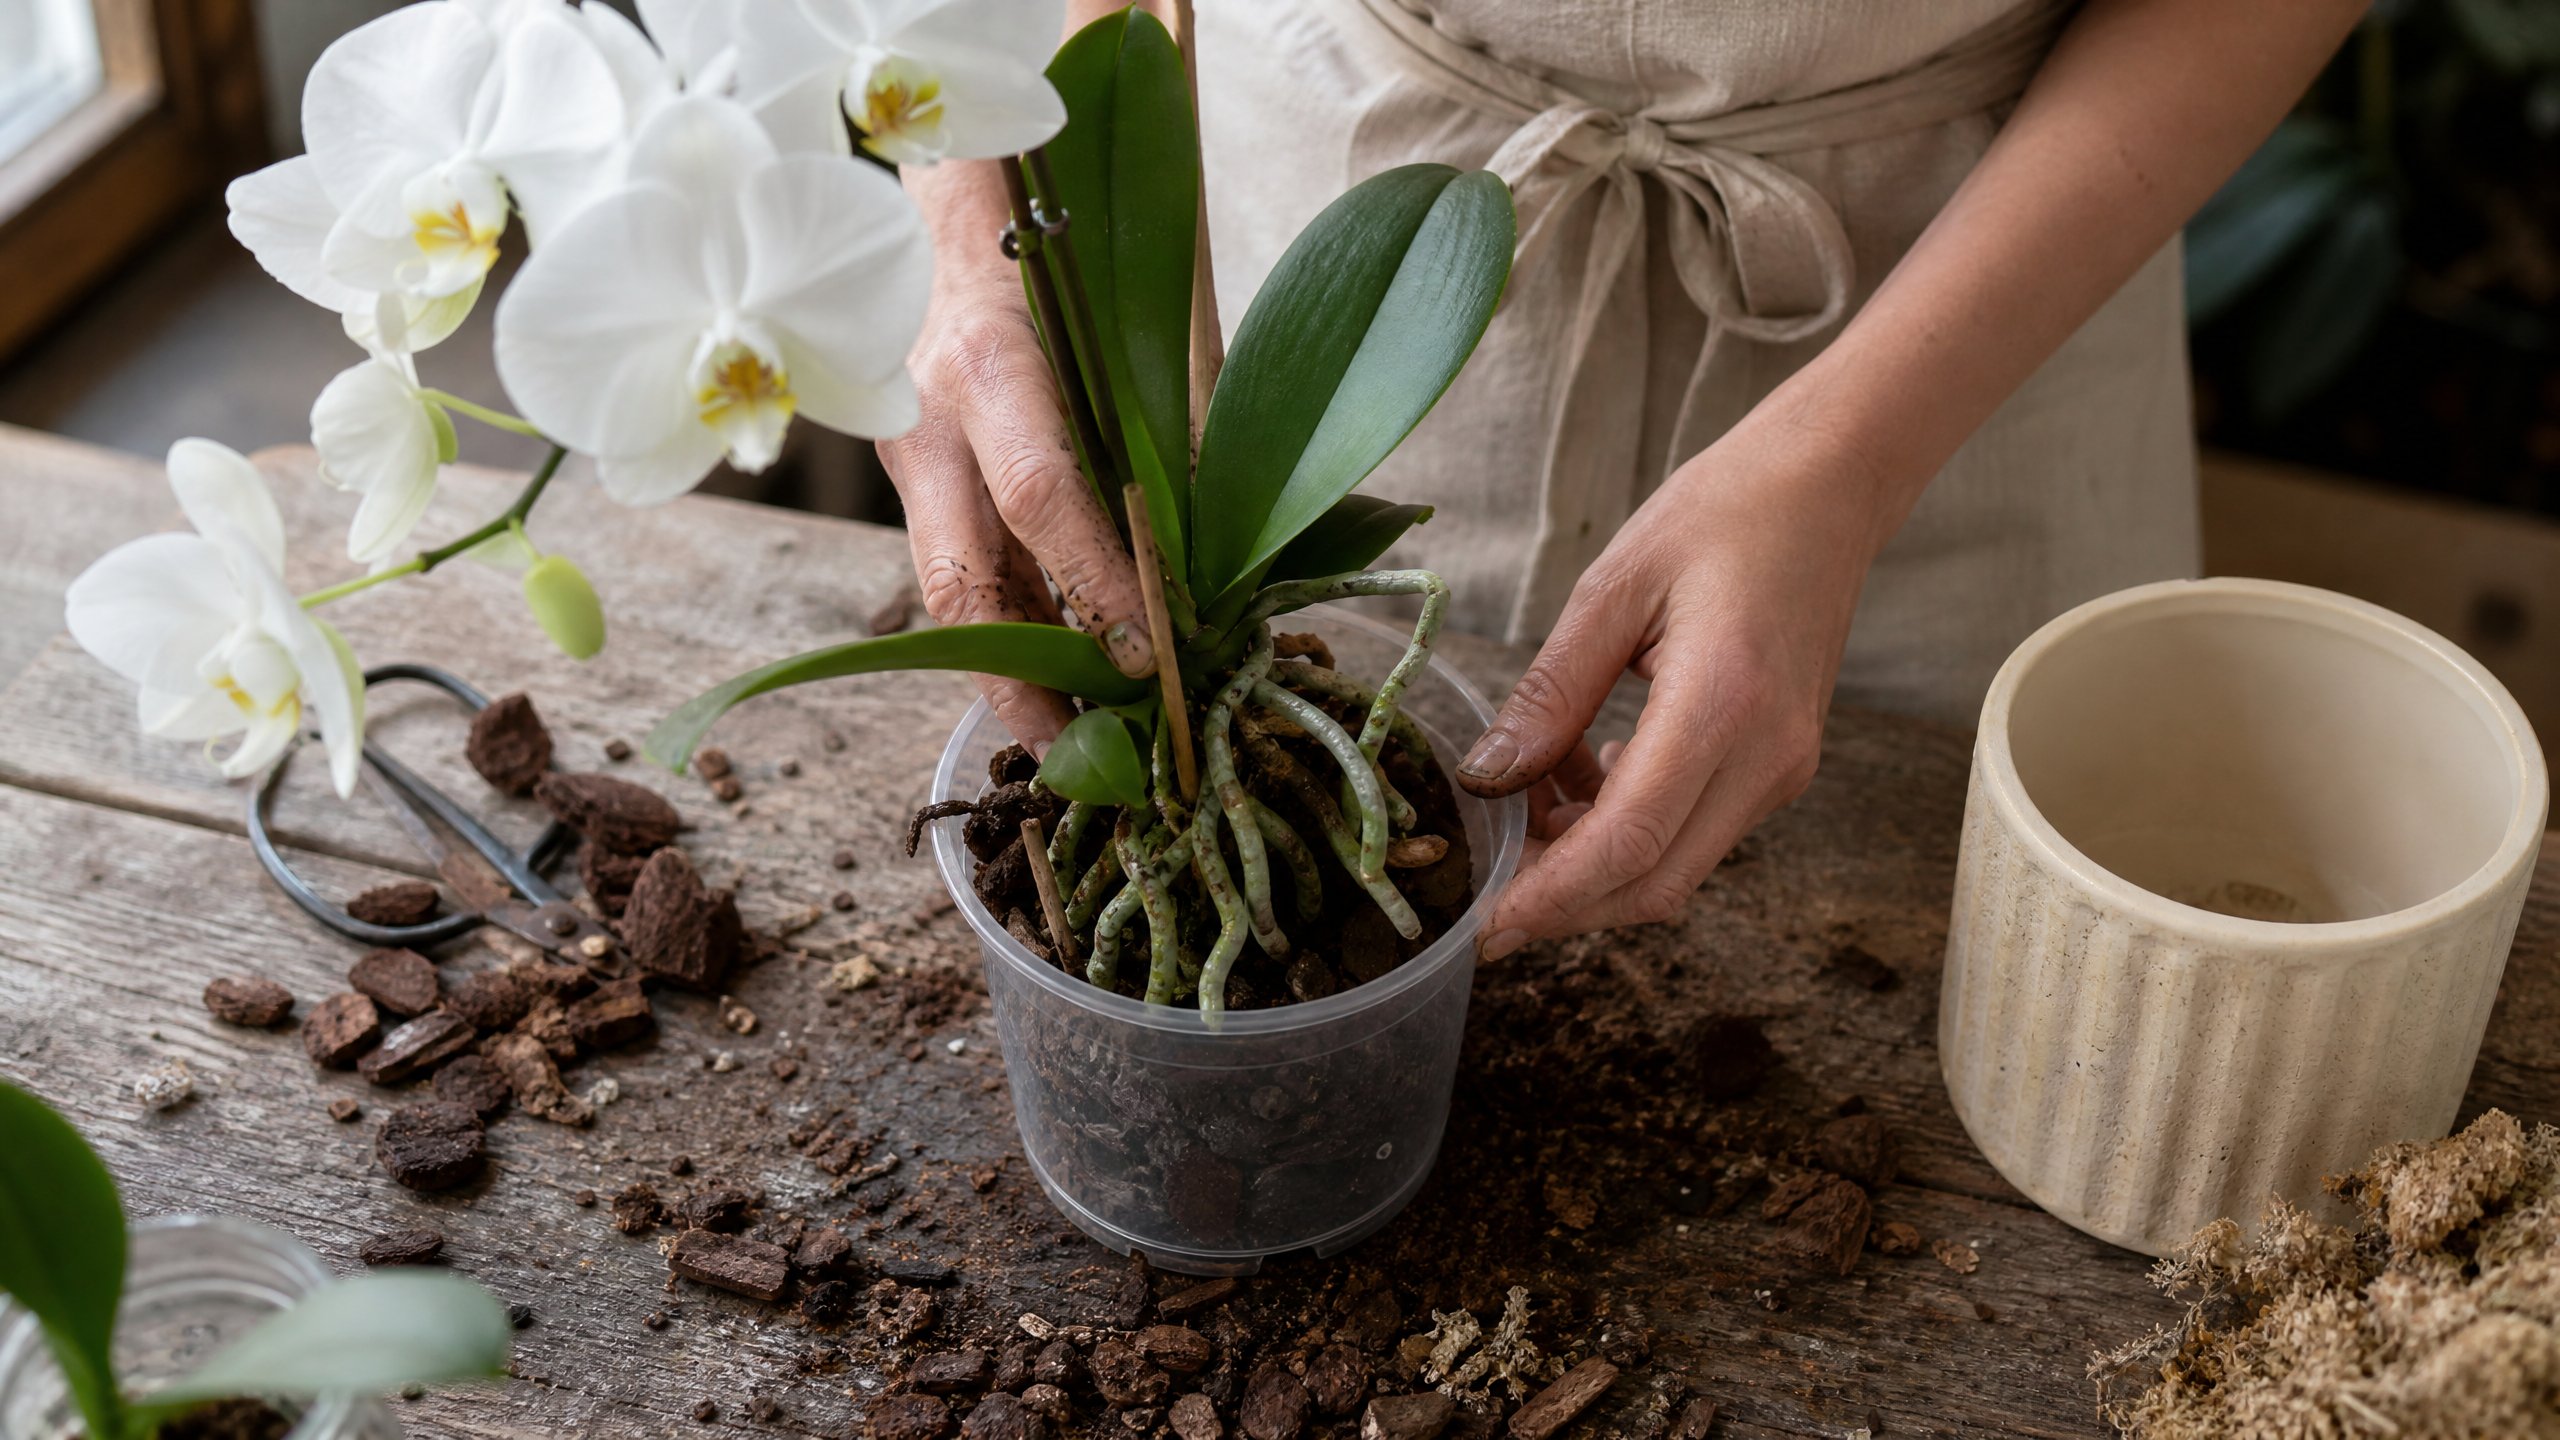
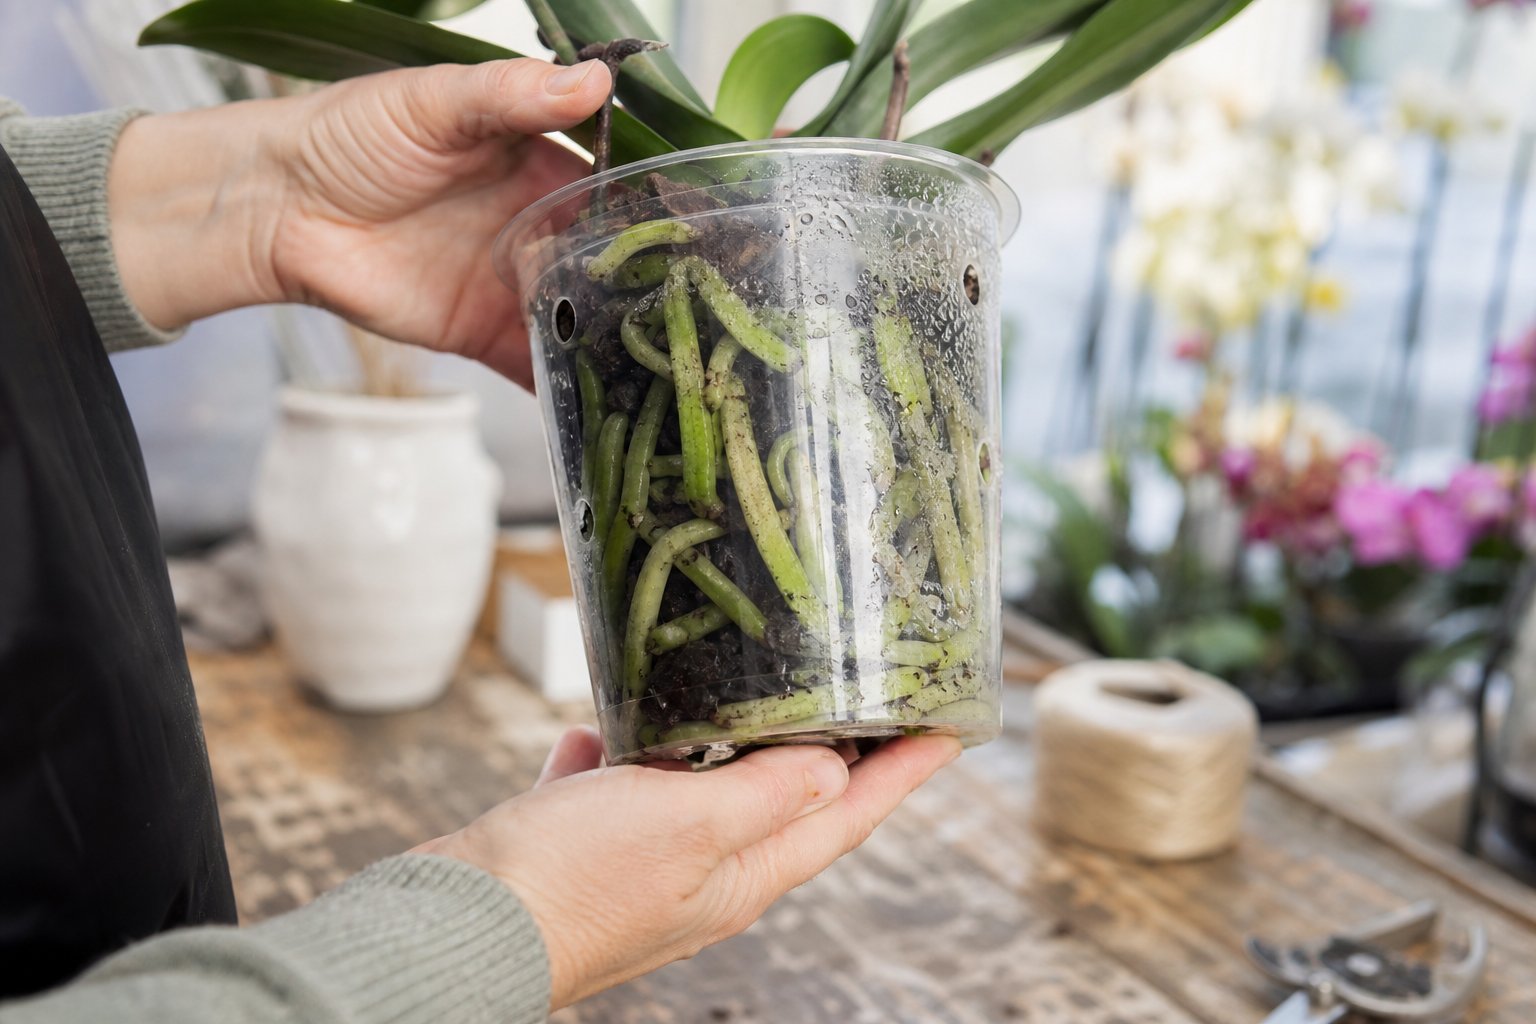
Orchid roots aren’t like other plant roots. In the wild, most of the orchids we sell are epiphytes, which means they grow on tree bark with their roots exposed to the air. That’s the single most important thing to know. Their roots need light, air, and a chunky, fast-draining medium. Regular potting soil will smother them.
What I’d do: pot your orchid in a clear plastic pot with drainage slits, then drop that pot into a decorative outer pot. The clear pot lets you see the roots, which tells you when to water and when to leave it alone. Green and plump means happy. Silvery-gray means thirsty. Brown and mushy means trouble.
For the mix, use a bagged orchid bark blend. Don’t try to make your own from regular bark mulch, and don’t reuse old mix. The bark breaks down over time, which is why orchids need repotting every year or two.
Get the Light Right

Bright, indirect light. That’s the answer for nearly every orchid sold as a houseplant.
An east-facing window is ideal. South-facing works if you’ve got a sheer curtain to filter the afternoon sun. North-facing usually isn’t enough light to push a rebloom, though the plant will survive. West-facing tends to be too hot in summer without some kind of buffer.
The leaf color tells you everything. A healthy orchid leaf is medium green, not dark forest green and not yellowish. Dark green means not enough light. Yellow or red-tinted means too much. Adjust the location and the plant will adjust with you over a few weeks.
Water Less Than You Think
The fastest way to kill an orchid is to water it on a schedule. The second fastest is to leave it sitting in a saucer of water.
In my experience, once a week is the average for most homes, but the only way to know for sure is to check the roots and the weight of the pot. If the roots through the clear pot still look green and the pot feels heavy, wait. If the roots are silvery and the pot feels light, it’s time.
When you do water, do it thoroughly. Take the plant to the sink, run room-temperature water through the bark until it drains freely out the bottom, then let it sit for ten minutes to finish draining before putting it back. That deep flush is what the roots need. A dribble from a watering can isn’t enough.
Skip the ice cube trick. I know it’s everywhere online. Orchids are tropical plants. Sub-freezing water on their roots is not what nature had in mind.
Feed Lightly and Often
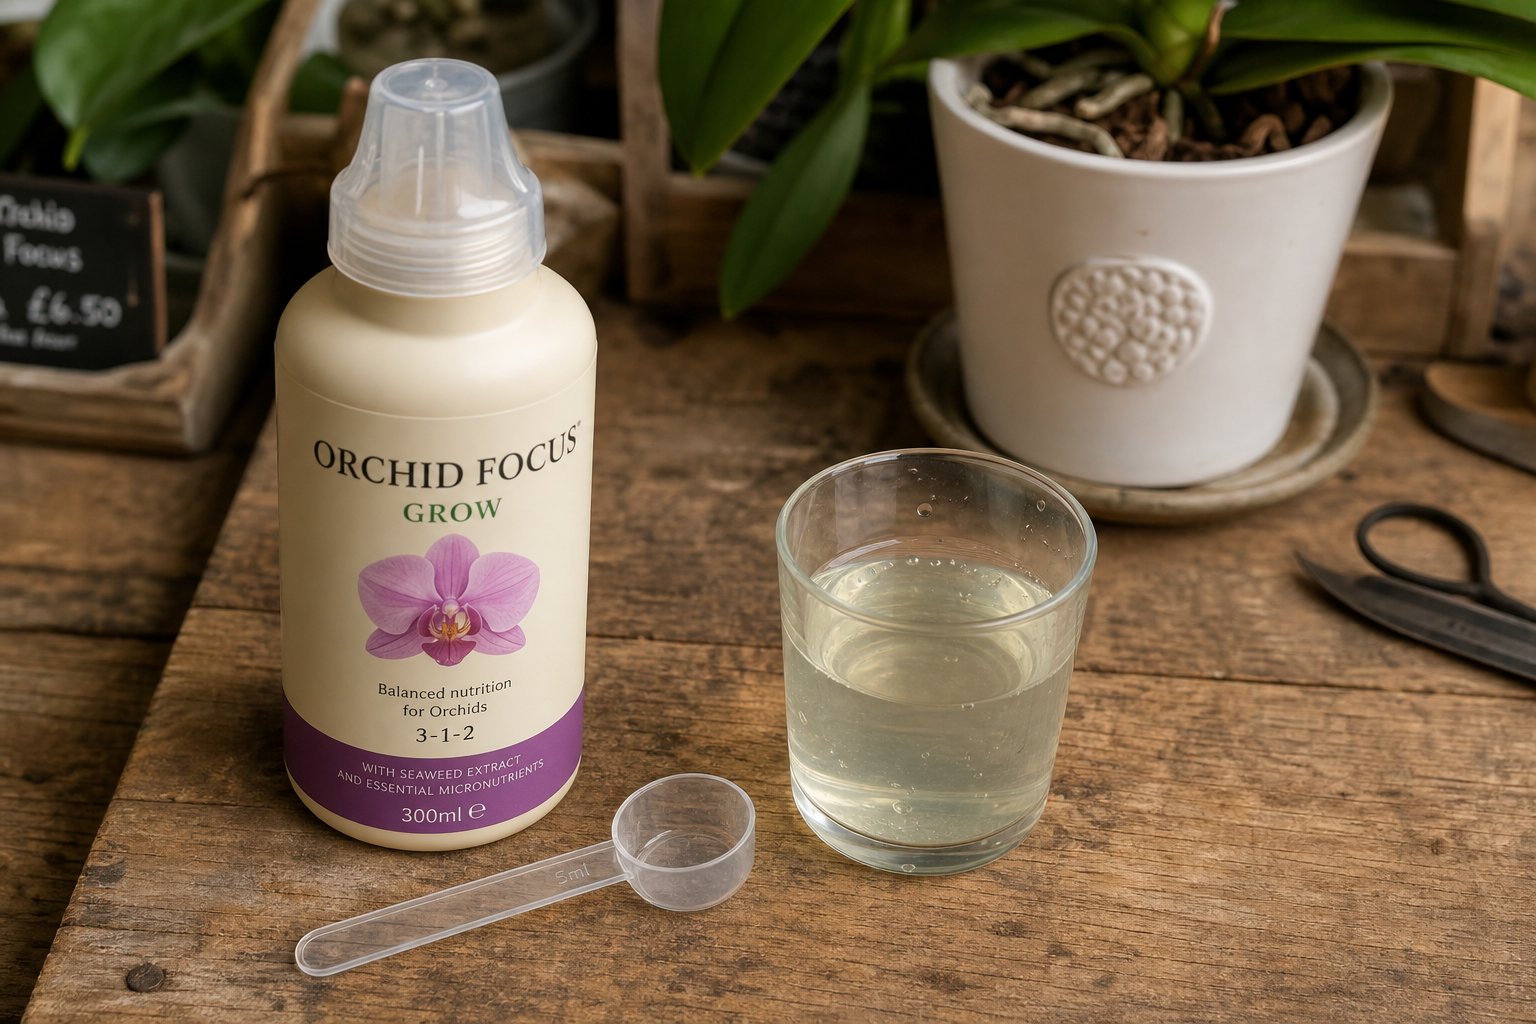
Orchids in bark mix don’t get nutrition from their soil the way other plants do, so fertilizer matters. The rule I give customers is “weakly, weekly.” Use a balanced orchid fertilizer at quarter to half the recommended strength, every time you water, during the spring and summer growing months.
In fall and winter, back off to once a month or skip it entirely if the plant isn’t actively growing. You’ll see new root tips and new leaf growth when it’s working. If you see nothing for months, the plant is resting and doesn’t need food.
Every fourth or fifth watering, skip the fertilizer and flush with plain water. This rinses out built-up mineral salts that can burn the roots over time.
What I Use in the Shop

What I use in the shop:
- Sun Bulb Better-Gro Special Orchid Mix: The bagged bark blend I reach for when I’m repotting. Right chunk size, drains fast, and it’s available everywhere.
- Clear Plastic Orchid Pots with Drainage Slits: Lets you watch the roots without disturbing the plant. Once you’ve used clear pots, you won’t go back.
- Better-Gro Orchid Plus Fertilizer: A 20-14-13 formula made specifically for bark-grown orchids. Dilute it weakly and use it weekly during the growing season.
- Fiskars Micro-Tip Pruning Snips: For cutting back finished spikes and trimming dead roots at repotting time. Sharp, clean cuts every time.
- Humidity Tray with Pebbles: A cheap fix for the dry indoor air most homes have in winter. Sit the pot above (not in) the water and the local humidity climbs.
Repot When the Mix Breaks Down
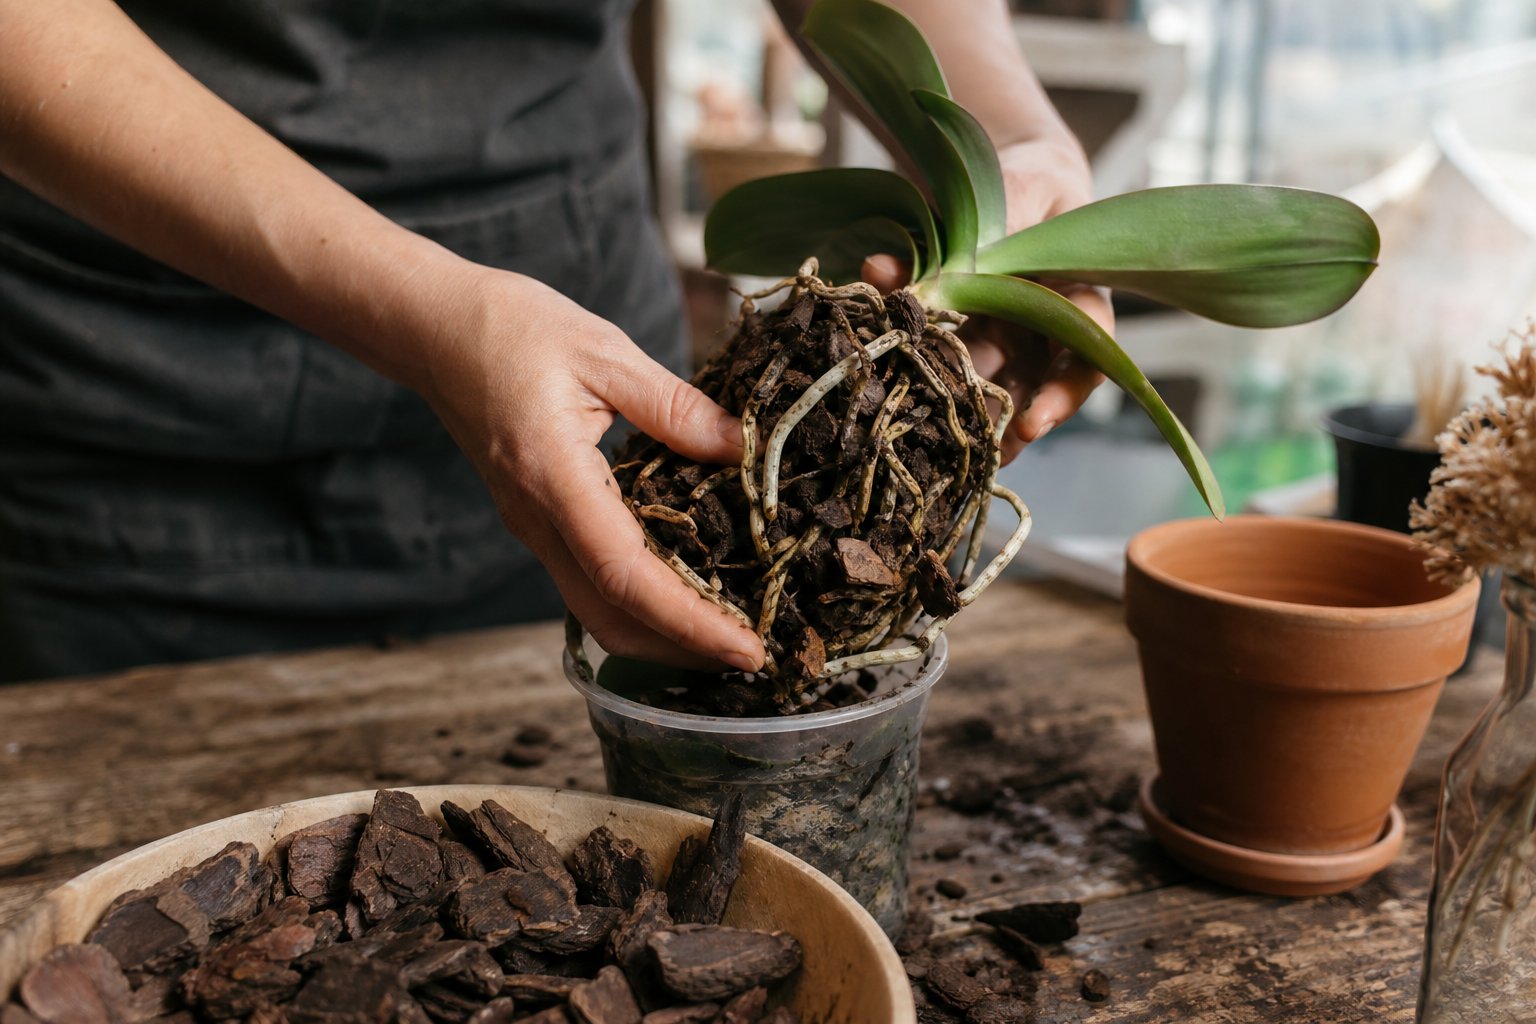
Most orchids need to be repotted every one to two years. The signal isn’t the calendar, it’s the bark. When the chunks have softened, broken down to small particles, or started holding water like soil, it’s time. A mushy mix is the leading cause of root rot in otherwise healthy plants.
The best window for repotting is right after the flowers finish and you see new root growth starting. Slide the plant out, work the old bark off the roots, trim any roots that are brown and hollow, and settle it into fresh mix in a pot just one size up. Water once and then leave it alone for a week to let any cut surfaces callous over.
If you’ve got a Phalaenopsis orchid, which is by far the most common orchid sold today, I’ve got a more detailed care guide just for those. They’re the easiest orchid to keep alive, which is why they’re everywhere.
Propagate Through Division or Keikis
Most home growers never bother propagating their orchids, and that’s fine. But if you’ve got a plant you love and want more of, there are two ways to do it.
Division works for orchids with multiple growth points, like Cattleyas and Oncidiums. At repotting time, separate the rhizome into sections, making sure each section has at least three or four pseudobulbs and some healthy roots. Pot each division separately.
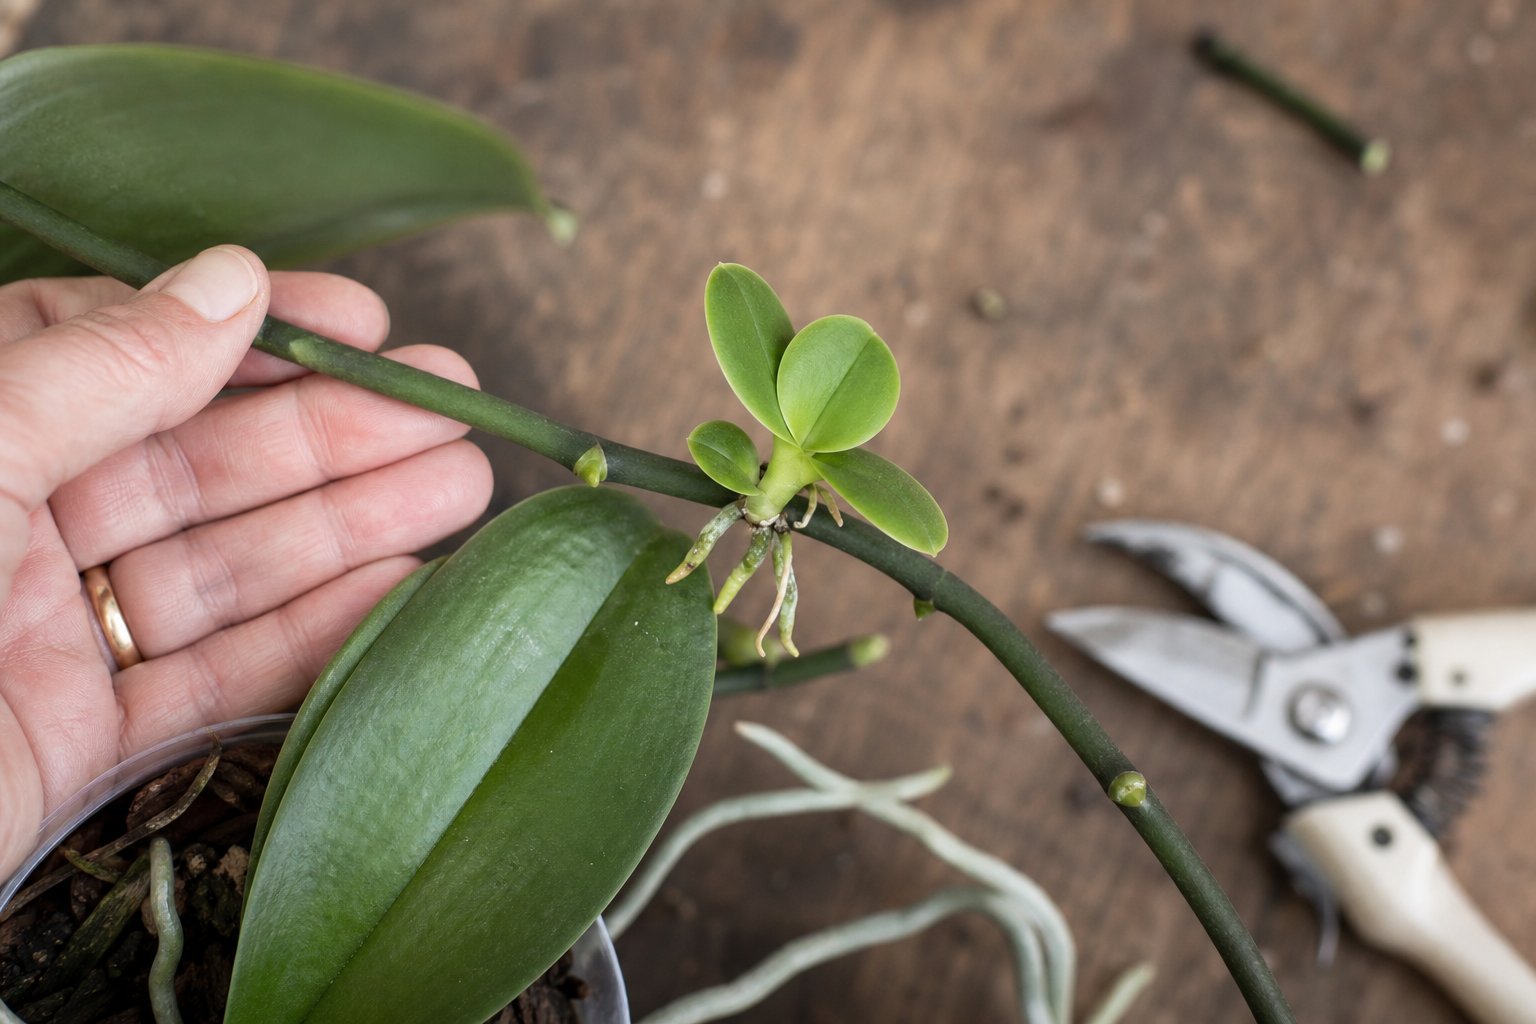
Keikis are baby plants that some orchids, particularly Phalaenopsis and Dendrobiums, will produce on their stems. When a keiki has its own leaves and roots about two inches long, you can cut it free and pot it up as its own plant. It will need a few months to settle in before it pushes new growth.
Watch For Pests and Problems
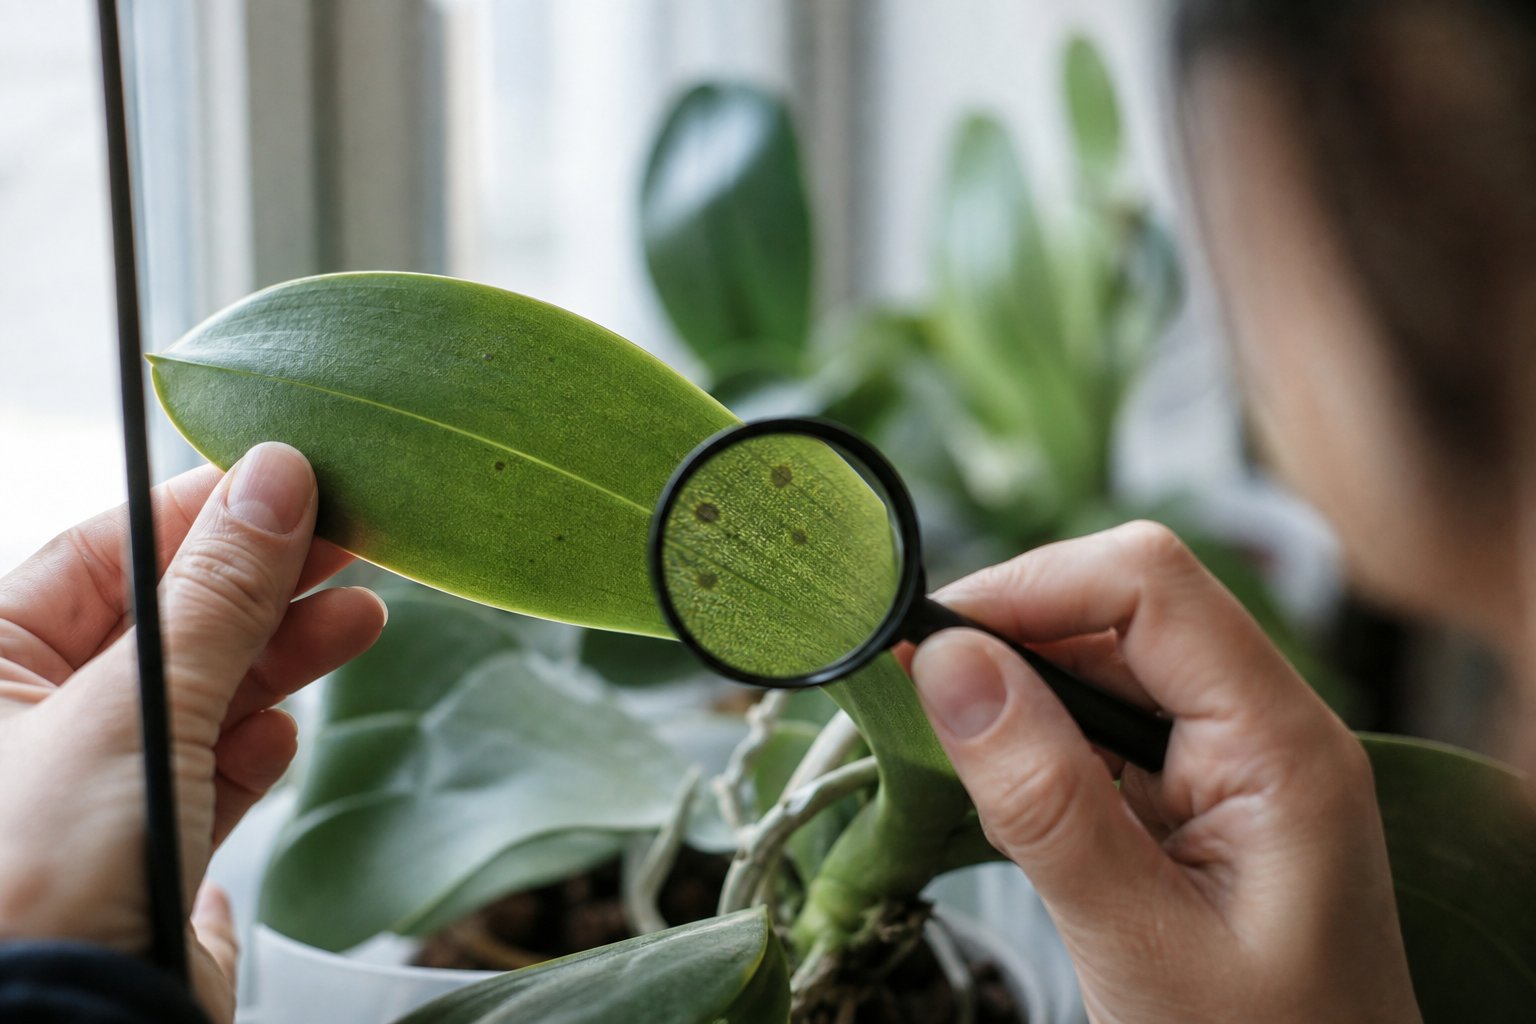
Healthy orchids in a clean growing space rarely have serious pest problems. When they do, it’s usually one of three things.
Mealybugs look like little tufts of white cotton tucked into leaf joints and along stems. Wipe them off with a cotton swab dipped in rubbing alcohol, then keep checking weekly until you’re sure they’re gone.
Scale shows up as small brown bumps on stems and the undersides of leaves. Same treatment, plus a follow-up with insecticidal soap if the population is large.
Spider mites cause fine stippling on leaves and tiny webs in bad infestations. They thrive in dry indoor air, so raising humidity around the plant usually solves the problem before chemicals are needed.
For deeper identification help, the American Orchid Society pest and disease guide is the best reference I’ve found online.
Avoid These Common Mistakes
The mistakes I see most often in customers’ orchids aren’t exotic or complicated. They’re the same five every time.
- Watering on a schedule. Watering once a week regardless of conditions kills more orchids than any pest. Check the roots and the pot weight every time.
- Decorative pots with no drainage. Beautiful, and a death sentence. Always use a drainage pot inside the decorative one, and dump out any water that pools at the bottom.
- Cutting the spike too soon. A Phalaenopsis spike can produce a second flush of blooms from a side branch if you leave it. Wait until the spike turns brown before cutting it off at the base.
- Repotting in regular potting soil. I see this every year. Orchid roots need air, and potting soil suffocates them within weeks. Bark only.
- Giving up too soon. An orchid between blooms can look like nothing’s happening for months. Healthy roots and healthy leaves mean the plant is fine. Be patient.
Frequently Asked Questions
How long do orchid blooms typically last?
It depends on the variety. Phalaenopsis blooms can last two to three months, sometimes longer. Cattleyas and Dendrobiums tend to bloom for three to six weeks. Once the flowers drop, the plant is just resting before it pushes a new spike.
Why won’t my orchid rebloom?
Nine times out of ten, it’s a light problem. Move the plant to a brighter spot with bright indirect light all day. For Phalaenopsis specifically, a stretch of cooler nighttime temperatures in fall, around 55 to 65 degrees, often triggers a new spike.
Are orchids safe for pets?
Yes. Most common orchids, including Phalaenopsis, are non-toxic to cats and dogs according to the ASPCA. That makes them a good choice for households with curious pets. For more options, see my post on indoor houseplants safe for pets.
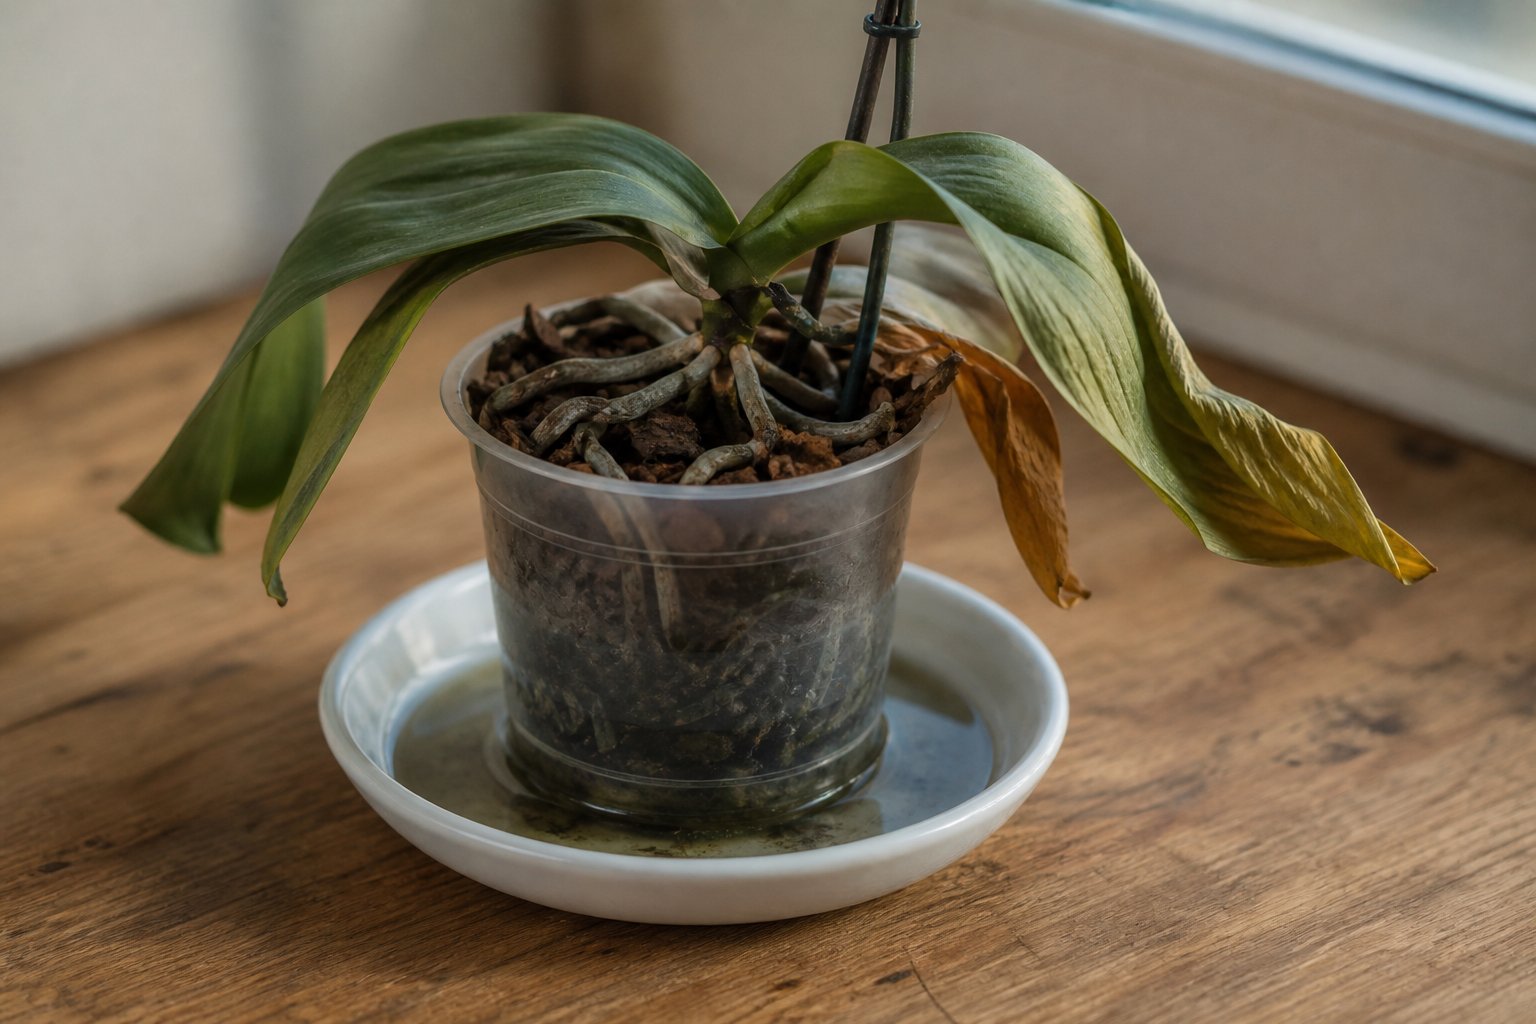
Why are my orchid’s leaves wrinkled or limp?
Limp leaves almost always mean a root problem. Pull the plant out and check. If the roots are firm and green or silver, you’re underwatering. If they’re brown, mushy, or hollow, you’re overwatering and the plant can’t take up moisture even when you give it. The fix is repotting in fresh bark and starting over.
Can I grow orchids without a greenhouse?
Absolutely. The orchids sold as houseplants are bred for home conditions. A bright windowsill, normal indoor temperatures, and basic attention to watering will keep most of them blooming for years.
How do I know when to water?
Two ways. Look at the roots through a clear pot, and lift the pot to feel its weight. Green roots and a heavy pot means wait. Silver roots and a light pot means water. Once you’ve done this for a month, it becomes automatic.
Closing Thoughts
Orchids reward attention more than effort. The people who keep them blooming year after year aren’t the ones doing the most. They’re the ones paying close enough attention to know when to leave the plant alone.
If you’ve got a plant that’s been sitting in a corner looking sad, don’t toss it. Check the roots, get it into fresh bark, find it a brighter window, and give it a few months. More orchids come back from the brink than you’d expect.
Which orchid type are you growing, and what’s giving you the most trouble? Drop a comment below and I’ll do my best to help you sort it out.
Like a good orchid spike, the right care plan takes its time. Plant the habit now, and the blooms follow.
Til next time,