Disclosure: This post may contain affiliate links. If you click and buy, we may earn a commission at no extra cost to you. As an Amazon Associate, we earn from qualifying purchases.
Last Updated: May 19, 2026
I had a mother of the bride walk into the shop last spring carrying several calla lilies she’d received from an online wholesaler the day before. She’d watched them go from gorgeous to limp overnight, and she wanted to know what she did wrong before she lost the whole order. I looked at the stems. Soft. Slimy at the base. Stored in cold water that hadn’t been changed.
It wasn’t her fault. Calla lilies don’t behave like other cut flowers, and most of the advice floating around online treats them like they do. They look bulletproof with that smooth, sculptural spathe and the thick, straight stem. But underneath that elegance is a flower that bruises easily, hates cold water, and rots from the bottom up if you blink.
The good news? Once you understand the quirks, calla lilies are one of the most rewarding flowers I work with. In my experience, 7 to 14 days of vase life is realistic for the standard white minis, with the larger varieties trending toward the upper end of that range when handled right.
Here’s how I process them from the moment a box hits the back door.
Know What You’re Working With First

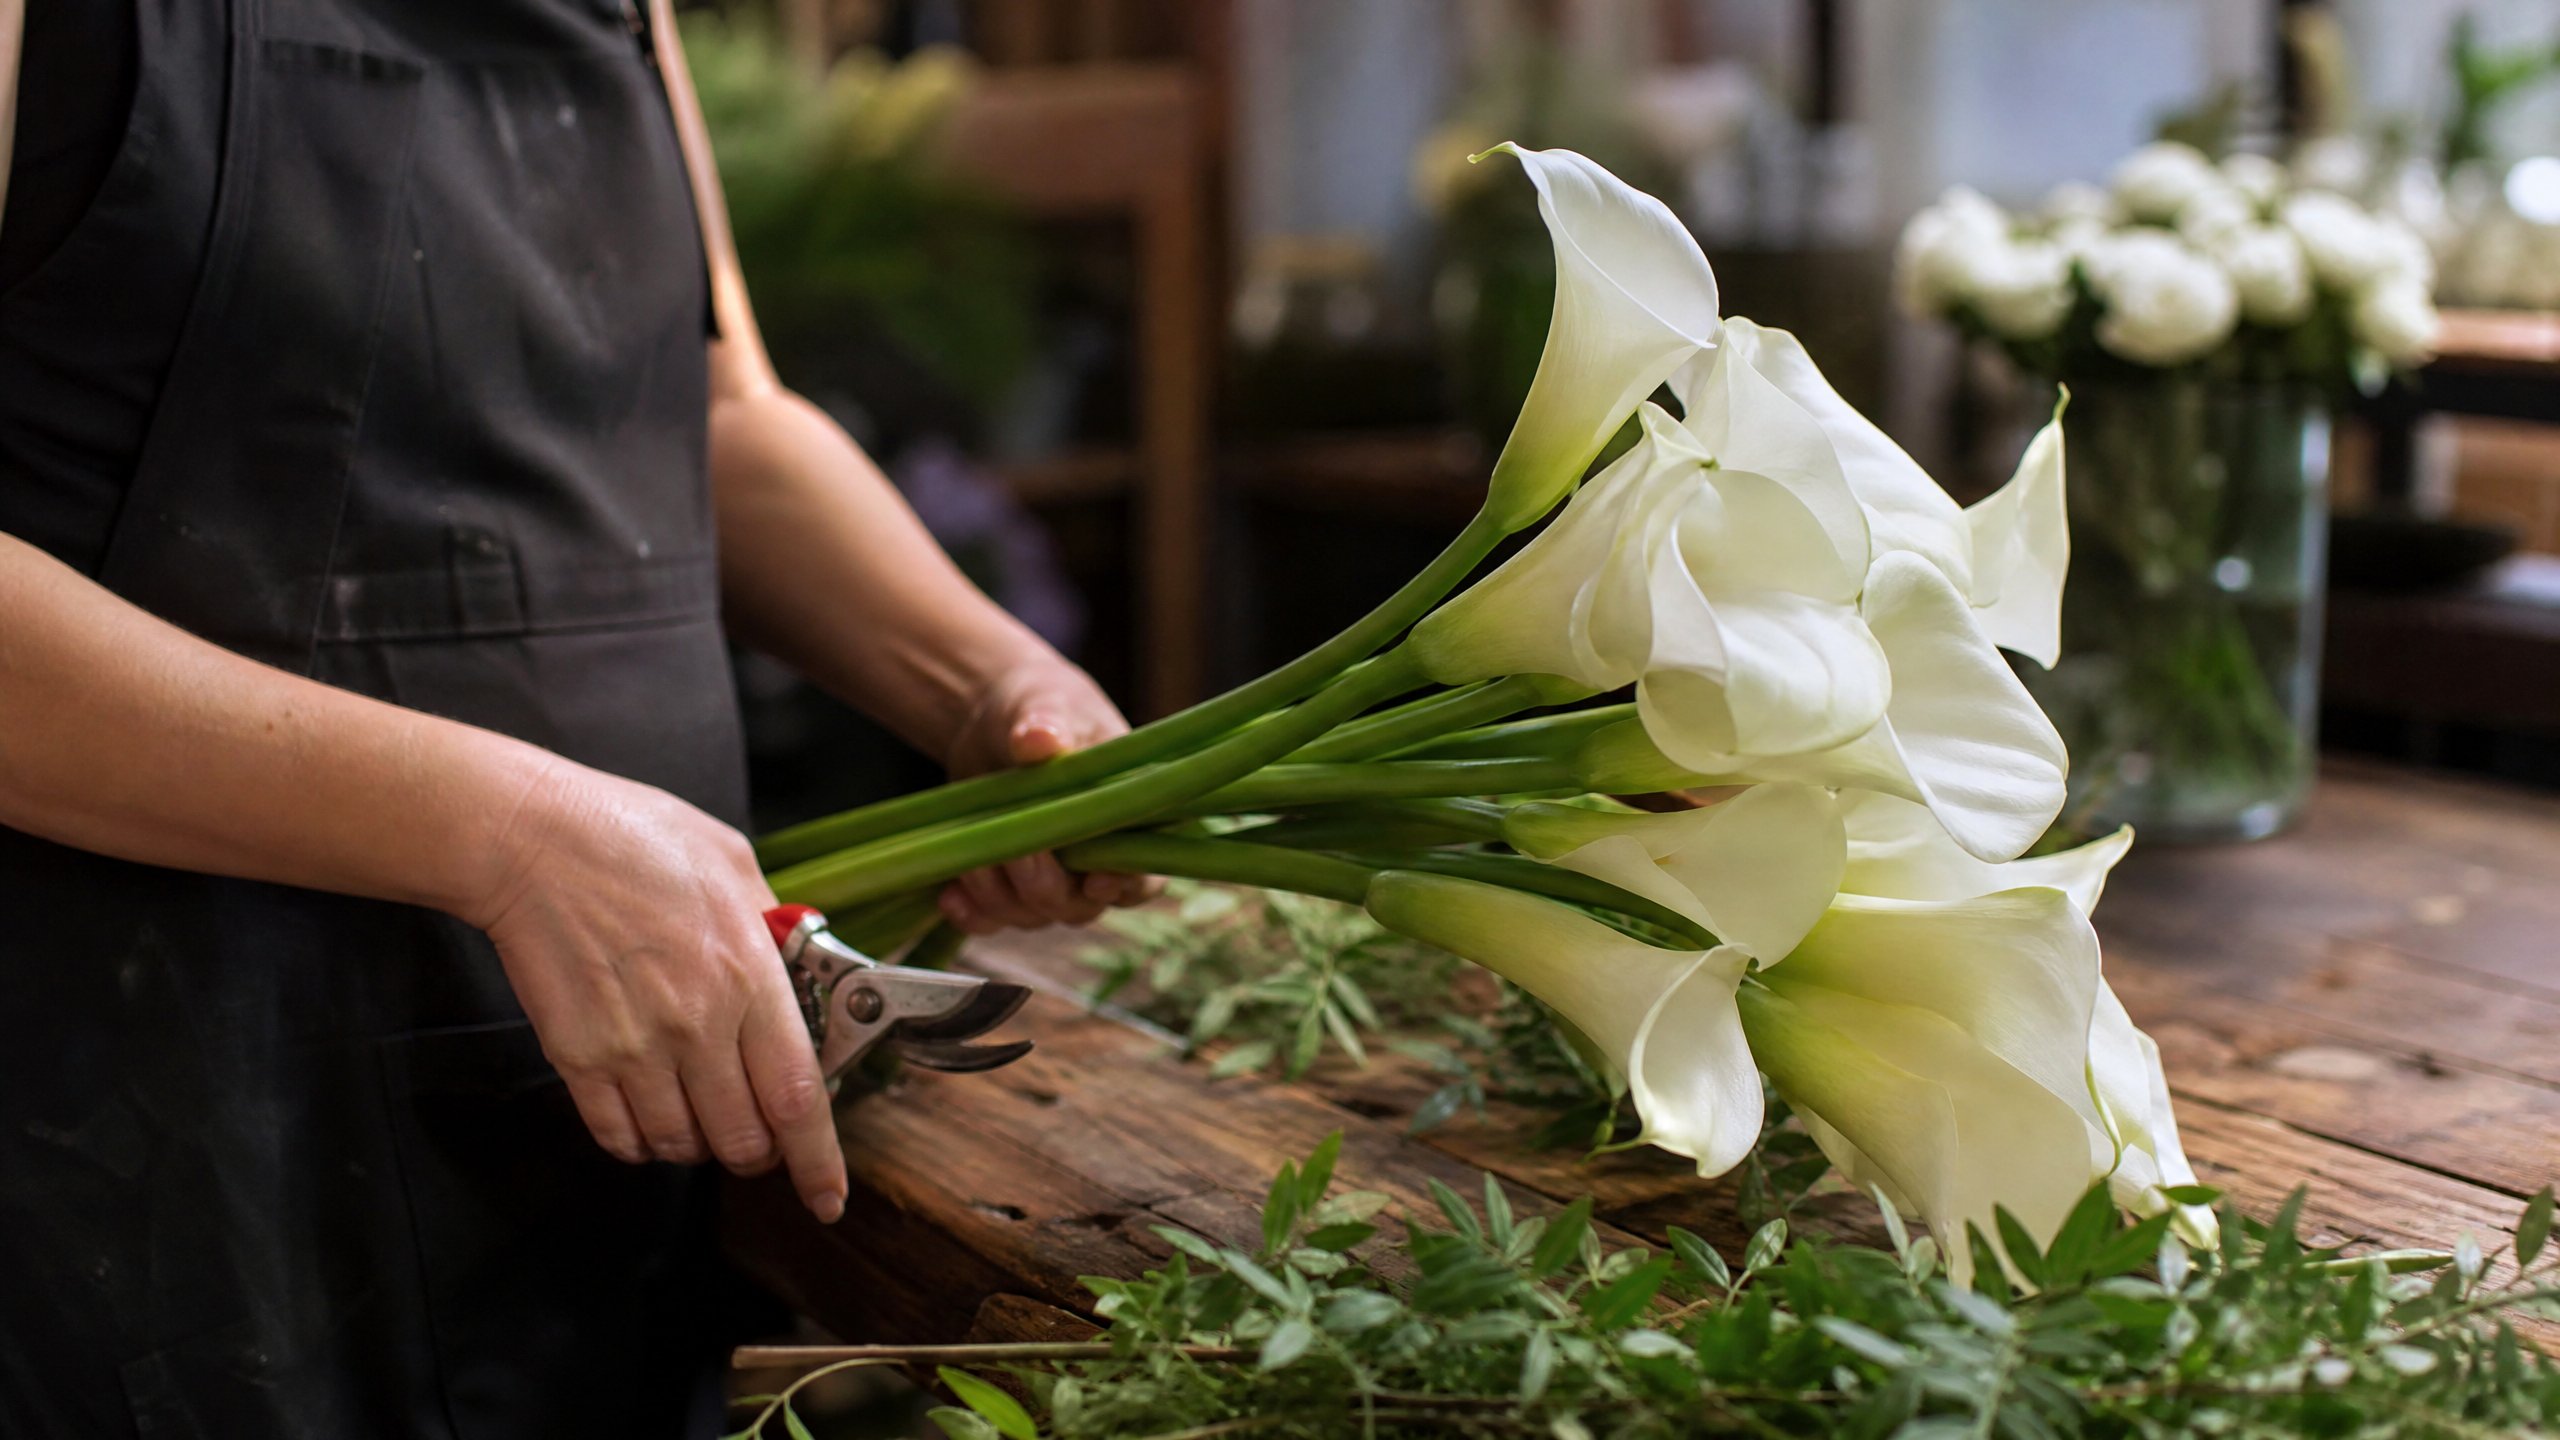
A quick orientation before we get into the steps. What looks like a single flower on a calla lily is actually two parts: the spathe (the smooth, curled outer “petal”) and the spadix (the yellow finger-like center). That whole structure rides on top of a fleshy, water-filled stem that’s more like a celery stalk than a rose stem.
That stem structure is the source of every problem people have with this flower. It’s full of water, which is great for hydration but terrible for rot. It’s soft and bruisable, which means rough handling shows. And it’s prone to curling at the cut end, which can look interesting in a freestyle bouquet but disastrous in a structured arrangement.
You’ll see calla lilies in two general categories at the wholesaler:
- Large callas (Zantedeschia aethiopica) — long stems, big white trumpets, the classic bridal flower
- Mini callas (Zantedeschia hybrids) — shorter stems, smaller blooms, available in every color from buttery yellow to almost-black burgundy
The care is essentially the same for both. The minis are a bit more forgiving because the stem mass is lower, and they hydrate faster. The big white ones are the divas, but the payoff in arrangements is hard to beat.
Gather Your Tools Before You Cut
Speed matters with calla lilies. Once they’re out of the box, you want to move fast — not because they’re fragile, but because every minute they spend dry is a minute working against you.
- A sharp floral knife — clean cuts only; bypass pruners crush these stems
- Clean buckets — calla lilies are particularly sensitive to bacterial buildup at the cut end
- Commercial floral preservative — Floralife Crystal Clear is what I use in the shop
- Floralife Quick Dip — for immediate post-cut hydration
- Room-temperature water — around 100°F for conditioning; cold water is a calla lily killer
What I use in the shop: Floralife Crystal Clear flower food — the antibacterial action is what saves calla lilies. Their thick stems shed cellular material into the water faster than most flowers, and dirty water will rot them from the bottom up in 48 hours.
For the full kit I keep within arm’s reach, my 8 floral design tools I use every single day guide covers what’s on my workbench at all times.
Unpack and Inspect Right Away

The minute the calla lilies arrive, get them out of the box. Don’t let them sit overnight in shipping packaging, even if you’re tempted to deal with them in the morning. The ethylene gas that builds up in transit, combined with the moisture trapped in the box, accelerates everything bad.
As you unpack, look for:
- Bruising or discoloration on the spathes — calla lilies show every bump; brown spots are usually permanent
- Soft or mushy stems — feel each one near the base; firm is good, squishy is the start of rot
- Curled or hooked stem ends — common with shipped callas; you’ll cut these off entirely
- Yellowing or limp blooms — usually a sign the stem isn’t drinking; can sometimes be revived with proper processing
Calla lilies often arrive looking a little flat or limp at the spathe. Don’t write them off. That’s transit dehydration, and with proper conditioning, most of them will firm right back up. The ones that won’t recover are the ones with bruising or stem rot, not the ones that just look tired.
Handle them carefully as you sort. The spathes bruise from fingerprints, not just from being dropped. I hold them by the stem only, never by the bloom itself.
Cut Stems Cleanly at a Sharp Angle
This is where most people lose their calla lilies before they ever hit a vase. The technique is specific.
- Hold the stem at a 45-degree angle against your cutting surface
- Cut 1 to 2 inches off the bottom with a sharp floral knife — never bypass pruners or scissors for this step
- Cut underwater if you can, or move from cut to water within seconds — calla lily stems pull air up the channel fast
- Dip immediately into Floralife Quick Dip before placing them in your conditioning bucket
The reason I’m picky about the knife: bypass pruners and scissors crush the stem walls on the way through. Calla lily stems are soft enough that the crushed cells then rot, sealing off the water channels in the first 24 hours. A sharp knife slices cleanly, leaves the channels open, and gives the stem its best shot at hydrating well.
What I use in the shop: Floralife Quick Dip — the stem dip is non-negotiable for me on calla lilies. It opens water uptake immediately and adds days to vase life. With a flower this prone to bent necks from dehydration, that head start matters.
Condition in Warm Water, Never Cold
Here’s the rule that surprises people: calla lilies hate cold water. They’re a tropical flower at heart, and putting them into icy water shocks the stem, slows hydration, and can cause the spathes to go limp permanently.
The conditioning sequence I follow:
- Mix preservative with warm water — around 100°F (38°C) — in a clean bucket
- Fill the bucket only 3 to 4 inches deep — calla lily stems rot if submerged too high
- Place the freshly cut, dipped stems straight into the solution
- Move to a cool room (55–65°F) out of direct sun — not the cooler if you can help it
- Let them condition for at least 4 hours, ideally overnight
The shallow water depth is important. Florists who’ve worked with roses for years sometimes default to deep water, and calla lilies will punish that habit. Deep submersion softens the stems and accelerates rot. Three to four inches is enough.
For event work, conditioning overnight is something I always recommend. Callas arrive tired, and rushing them into an arrangement before they’ve rested is the fastest way to wind up with bent necks at the reception. Give them the night, and they’ll repay you on event day.
For my full conditioning routine across every flower in the shop, my flower processing guide walks through the whole sequence in detail.
Display Calla Lilies Smarter Than the Average Flower

Once your calla lilies are conditioned and ready to arrange, the display environment makes or breaks vase life. The rules:
- Use a tall, narrow vase — calla lily stems are sculptural; let them stand tall rather than crowding
- Keep the water shallow — 3 to 4 inches is plenty, even in the final arrangement
- Use clean glass — bacterial film on metal or plastic shortens vase life fast
- Keep them cool — 65–72°F is the sweet spot; anything warmer wilts the spathes quickly
- Avoid direct sun, heat vents, and AC drafts — calla lilies dehydrate visibly within hours in these conditions
- Keep them away from fruit — ethylene gas accelerates wilting; calla lilies are especially vulnerable
One thing I love about calla lilies: they look intentional even when you just drop them in a vase. Three stems of long white callas in a tall cylinder is one of the most elegant arrangements you can make, and it takes about 30 seconds.
If you’re working on something more structured, my guide to arranging calla lilies in a tall cylinder vase walks through a centerpiece I’ve used for dozens of weddings.
Maintain Daily — Calla Lilies Punish Neglect
Maintenance is where calla lily vase life is won or lost. Skip the daily check, and you’ll cut the vase life in half. This flower doesn’t give you a grace period.
- Change the water entirely every 2 days — not every 3, not every week; calla lily stems shed cellular material fast, and cloudy water means rot is starting
- Recut the stems each time you change the water — a fresh angle cut, a quarter inch off the bottom
- Wipe the vase down with a clean cloth — bacterial film on the inside of the vase is invisible until it’s a problem
- Add fresh preservative every time you change the water, not just plain tap water
- Pull any stems that are starting to soften — one rotting stem will pull down the whole bunch
Calla lilies will absolutely die if you let the water go cloudy for three days, so set a reminder on your phone if you have to.
Avoid These Common Mistakes
Calla lilies have a few classic failure modes, and almost every one is avoidable. Here’s what I see go wrong most often:
- Storing them in icy water or the home fridge. Cold-shock is the number-one cause of permanently limp spathes. Cool, never cold.
- Filling the bucket too deeply. Calla lily stems rot from the submerged section first. Three to four inches of water is plenty.
- Using bypass pruners or kitchen scissors to cut. Crushed stems can’t drink. Use a sharp floral knife.
- Holding the spathes when sorting or arranging. Fingerprints bruise the surface. Always handle by the stem.
- Letting the stems curl after the cut. A little curl is natural, but a heavy curl means the stem has been out of water too long. Recut and dip immediately.
- Ignoring the water for a few days. Calla lilies dirty their water faster than almost anything else I work with. Two-day water changes are the minimum.
- Forcing them into floral foam. The stems are too soft to push through foam without damage. Use water vases or mechanics like a wire grid instead.
If you’re worried that you’re already past the point of saving a tired-looking calla lily, don’t be. Recut at a sharp angle, dip in Quick Dip, and put it in warm preservative water for a few hours. Nine times out of ten, it’ll come back. The exception is a stem that’s gone genuinely soft and slimy at the base — that one’s done.
Recommended Tools for Calla Lily Care
A short list of what’s earned a permanent spot on my workbench for this flower specifically:
| Item | Why It Matters for Calla Lilies | My Pick |
|---|---|---|
| Floral knife | Clean angle cuts without crushing the soft stem | Victorinox Floral Knife |
| Stem dip solution | Immediate hydration after cutting — critical for calla lilies | Floralife Quick Dip |
| Floral preservative | Antibacterial action — calla lilies dirty water fast | Floralife Crystal Clear |
| Finishing spray | Seals spathes on event-day arrangements | Floralife Finishing Touch |
If you’re deciding between finishing sprays for a wedding application, my finishing sprays comparison breaks down which one to reach for and when.
Design With Calla Lilies, Don’t Just Stick Them in a Vase

A quick aside on design, because calla lilies are one of the most architectural cut flowers I work with, and the temptation to treat them like a filler flower wastes everything that makes them special. They pair beautifully in:
- Modern, minimalist arrangements — three white callas in a tall cylinder is a complete statement
- Cascading bridal bouquets — long stems can be curved by hand into elegant cascade lines
- Sympathy work — the calla lily has long carried associations with peace and remembrance
- Color-blocked centerpieces — the mini varieties in burgundy, mango, or buttery yellow add saturated punch you can’t get from many other flowers
If you’re working on a wedding bouquet and want a real-world example, my cascading calla lily bridal bouquet tutorial walks through how I shape the cascade and what to watch for.
Frequently Asked Questions
How long do cut calla lilies last in a vase?
With proper care, expect 7 to 14 days. Mini callas trend toward the longer end when handled right. The large white varieties are more demanding, but I’ve held them in the shop cooler at proper humidity for 10+ days with no problem.
Why is my calla lily limp at the neck?
Bent neck on calla lilies is almost always one of three things: cold-water shock, deep-water rot, or dehydration from a delayed cut. The first is the most common. Move the flowers out of icy water, recut at a sharp angle, and rehydrate in warm preservative water at a shallow depth. Many limp callas will firm up within a few hours.
Should I refrigerate calla lilies overnight?
I generally don’t recommend the home fridge. The temperature is too cold and the dry air dehydrates the spathes. A cool room (55–65°F) is much better. Florists with proper coolers can hold them at the higher end of cooler temps, but home refrigerators do more harm than good with this flower.
Are calla lilies toxic to pets?
Yes. Calla lilies are toxic to cats and dogs if ingested, primarily because of the insoluble calcium oxalate crystals in the plant tissue. According to the ASPCA, they cause oral irritation, drooling, vomiting, and difficulty swallowing. Keep them well out of reach of pets, or choose a non-toxic alternative like lisianthus or alstroemeria for pet-friendly homes.
Can I use calla lilies in floral foam?
I’d avoid it. Calla lily stems are too soft to push through foam cleanly, and forcing them damages the stem walls. Use water-based mechanics instead — a wire grid in a low vase, a flower frog in a compote, or simply a tall cylinder vase.
How do I straighten a calla lily stem?
You can gently shape calla lily stems by hand while they’re freshly conditioned and the cells are full of water. Wrap them loosely in a damp paper towel, hold them in the desired curve for 30 seconds to a minute, and they’ll often hold the new shape. This is how florists create those graceful cascading bouquet curves.
Closing Thoughts
Calla lilies look like they should be the easy ones. Sculptural, simple shape, no thorns, no falling petals. But they reward the florists who treat them with care and punish the ones who don’t. Cool water, shallow depth, sharp knife, fast cut-to-water transition, daily water changes. That’s the whole formula.
Do those things, and you’ll get a flower that holds its shape, keeps its color, and gives you arrangements that look intentional, whether you spent 30 seconds or three hours building them. That’s a lot of mileage for a stem that’s been associated with elegance since the Greeks.
Plant the right care habits today, and your calla lilies will keep their poise long after most other flowers have given up. I’d love to hear what varieties you’re working with. Drop a note in the comments and tell me how it’s going.
Til next time,