Disclosure: This post may contain affiliate links. If you click and buy, we may earn a commission at no extra cost to you. As an Amazon Associate, we earn from qualifying purchases.
Last Updated: June 2026
A woman came into the shop a few years back, two weeks before her daughter’s prom, asking if I could teach her how to make the corsage herself. She had a budget, some ambition, and absolutely no idea where to start. I handed her a spool of floral wire and said, “Let’s begin here.”
Wiring flowers is one of those foundational skills that unlocks a lot of doors in floral design. Once you understand it, making a corsage, building a boutonniere, or constructing a floral dog collar all start to feel much more manageable. Skip it, and you’re basically trying to build a house without knowing how to frame a wall.
The video below, from FlowerJoos, is one of the better demonstrations I’ve seen of proper wiring technique for common corsage and boutonniere flowers. Take a look. I’m confident you’ll pick up at least one thing you can use.

Understand Why Wiring Matters Before You Touch a Stem

Wiring isn’t just about support. It’s about control. When you wire a flower head, you’re replacing the natural stem with something you can bend, angle, and position precisely. That matters a lot when you’re designing something a person is going to wear all night.
In my experience, the most common problem I see in beginner-made corsages isn’t the flowers. It’s that everything is stiff and flat because the mechanics were skipped or done wrong. Wiring gives you the flexibility to work with the flower, not against it.
The two gauges primarily used for corsage work are #22 wire (heavier, and good for larger blooms and structural support) and #26 wire (lighter, better for delicate flowers and fine detail work). Both come in standard 16-inch lengths. That’s what I keep stocked at the shop.
Learn the Pierce Method First
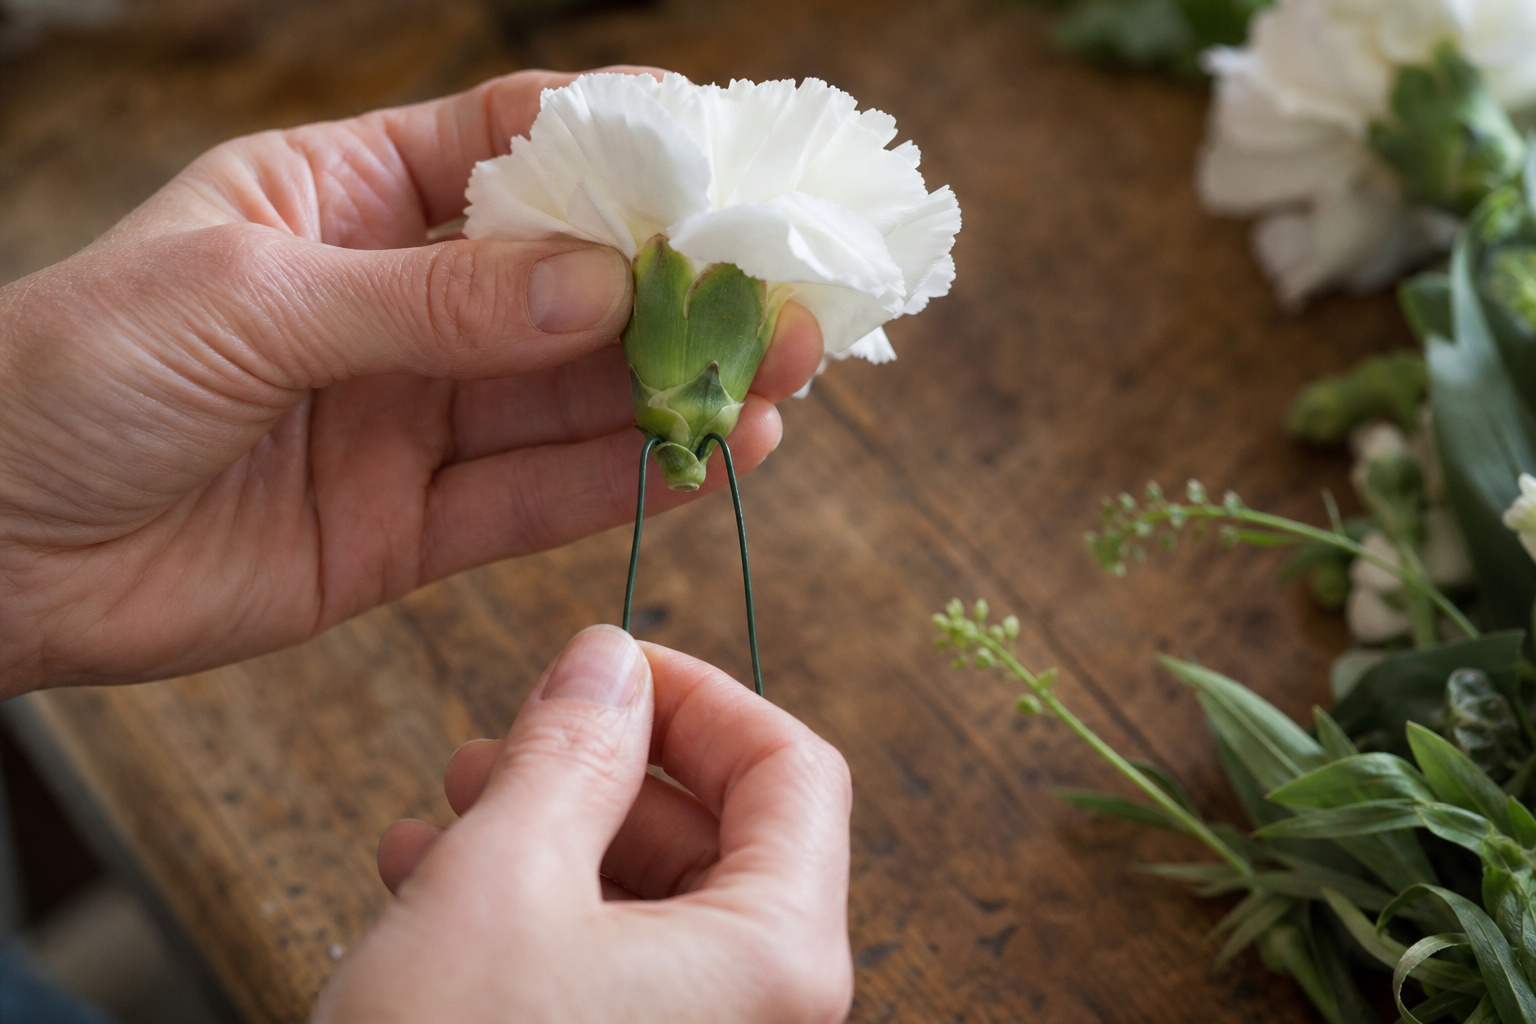
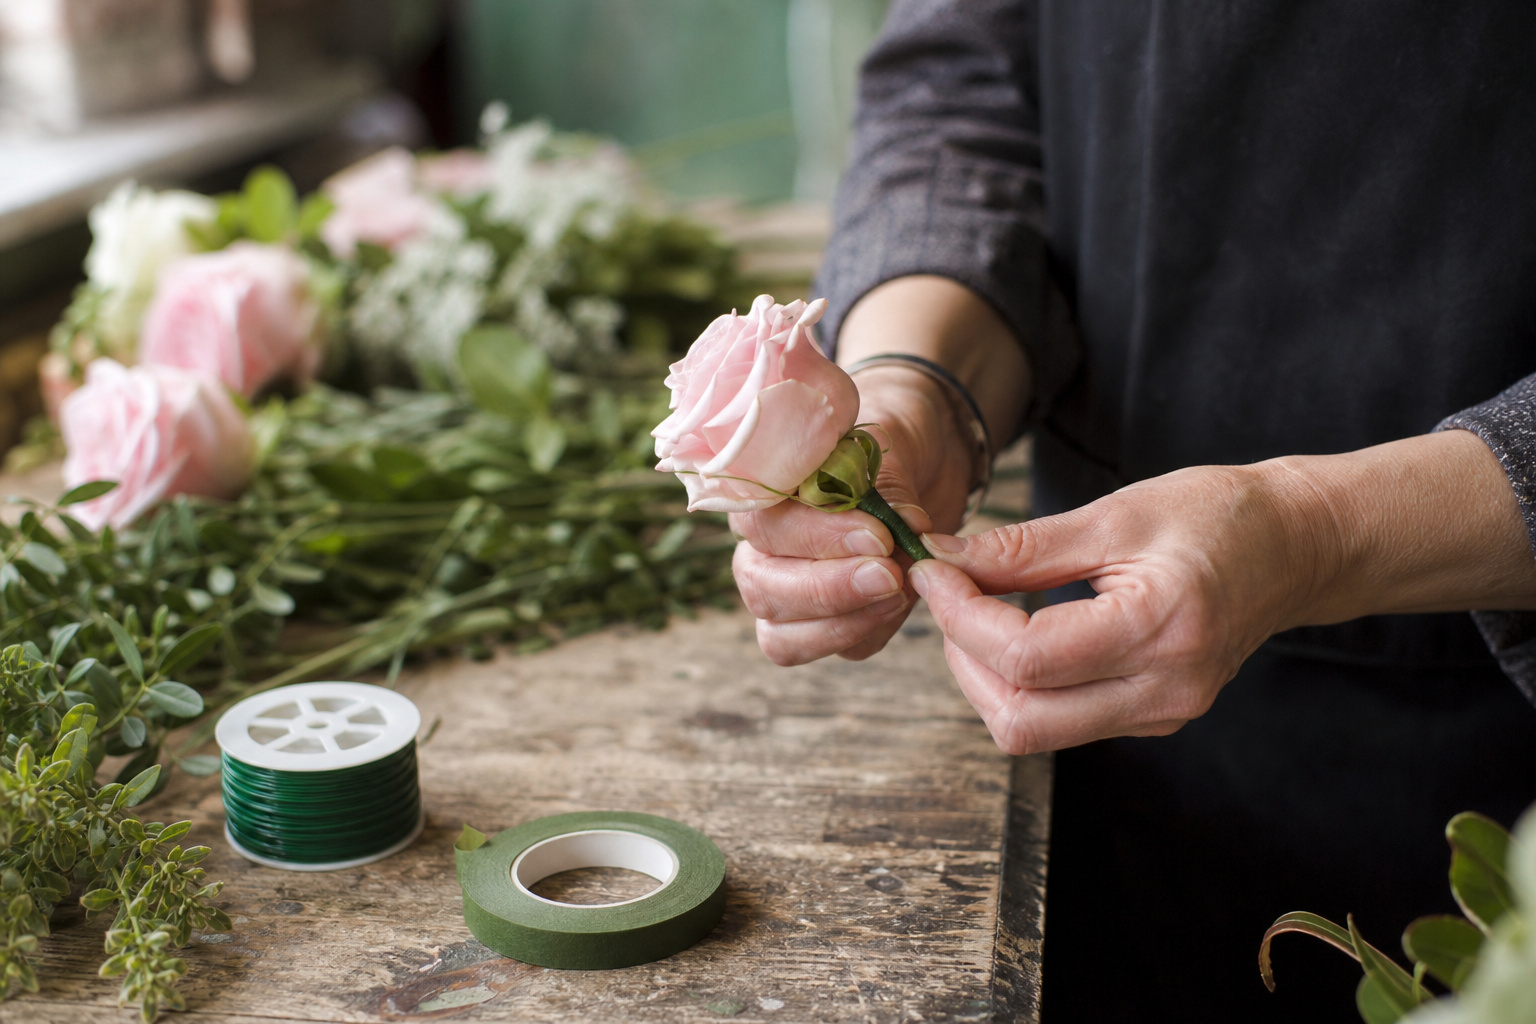
If you’re just starting, the pierce method is where I’d have you begin. You push the wire through the calyx (the base of the flower head), then bend both ends of the wire downward parallel to the stem. You’ve essentially made a new stem out of wire.
This works well for carnations, roses, and similar flowers with a firm calyx. It’s reliable and relatively forgiving if you’re still getting your hands used to working with wire.
Once both ends are pulled down, wrap the whole thing, wire and remaining natural stem, with floral tape. The tape adheres to itself when stretched slightly as you wrap, so don’t be shy about putting a little tension on it.
Clean, tight tape work is what separates a corsage that holds together from one that starts unraveling by the time the limo shows up.
Use the Hook Method for Flowers That Won’t Pierce
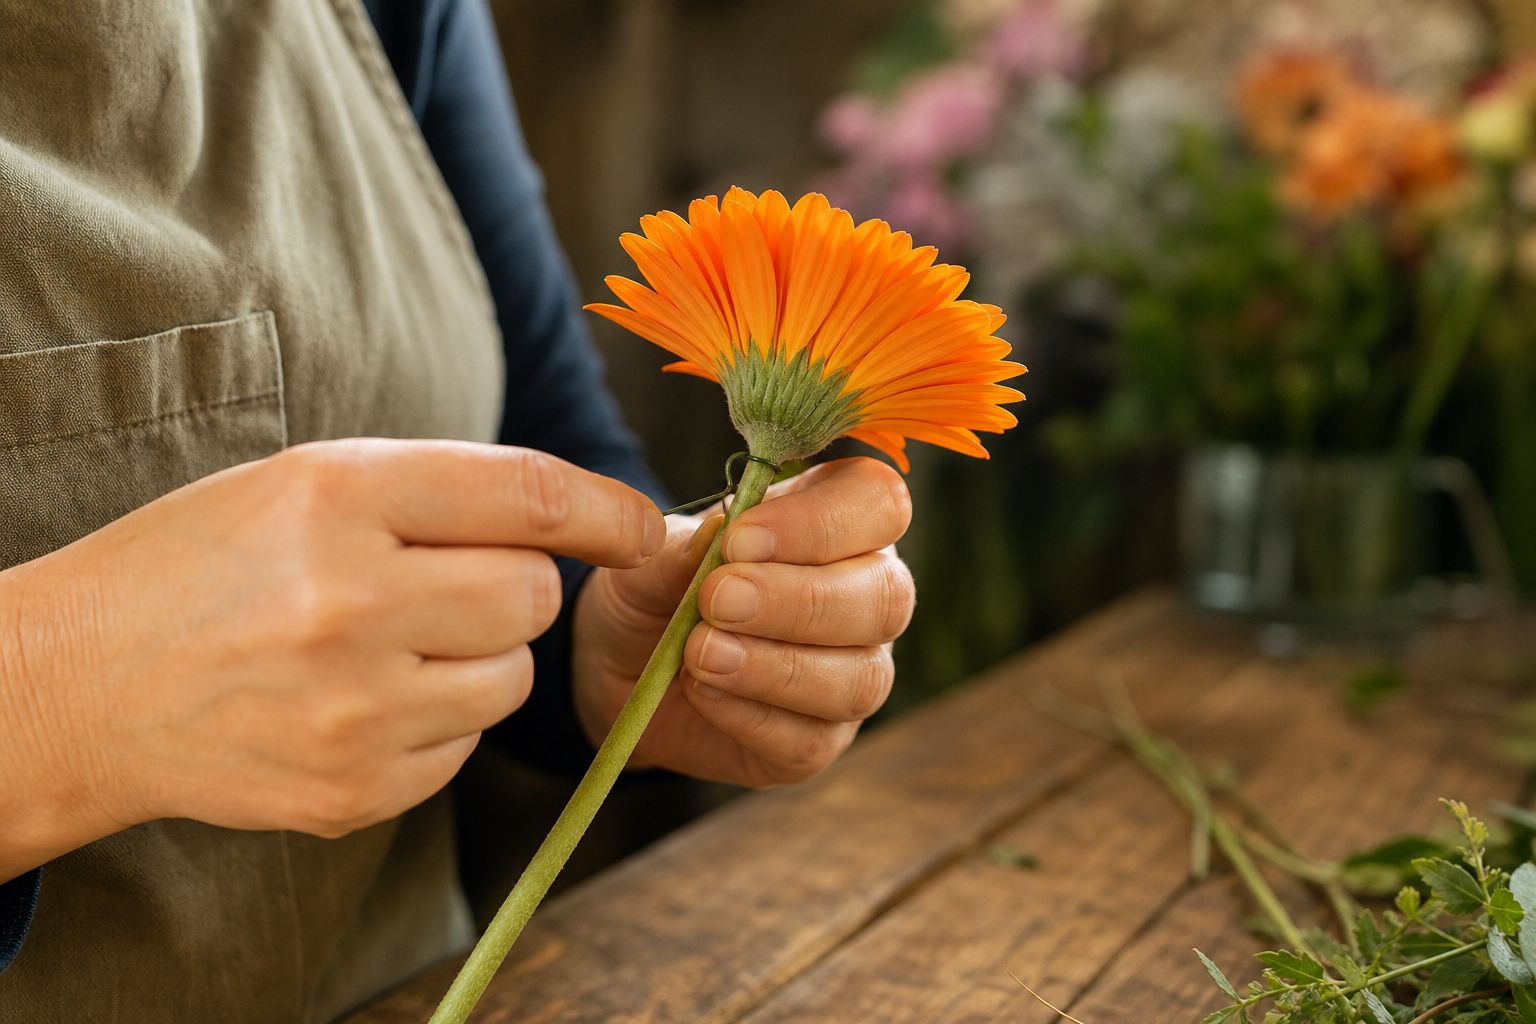
Some flowers don’t have a calyx that cooperates. Gerbera daisies, for instance, have a flat head that makes piercing awkward. For those, the hook method works better.
Push the wire up through the stem and into the base of the flower head, then bend the top of the wire into a small hook and pull it back down until the hook catches inside the flower. It sounds fussier than it is. After a few tries, it goes fast.
Same finishing step, wrap with floral tape from the base of the flower head all the way down the wire. Keep it snug.
Get Your Supplies Right the First Time
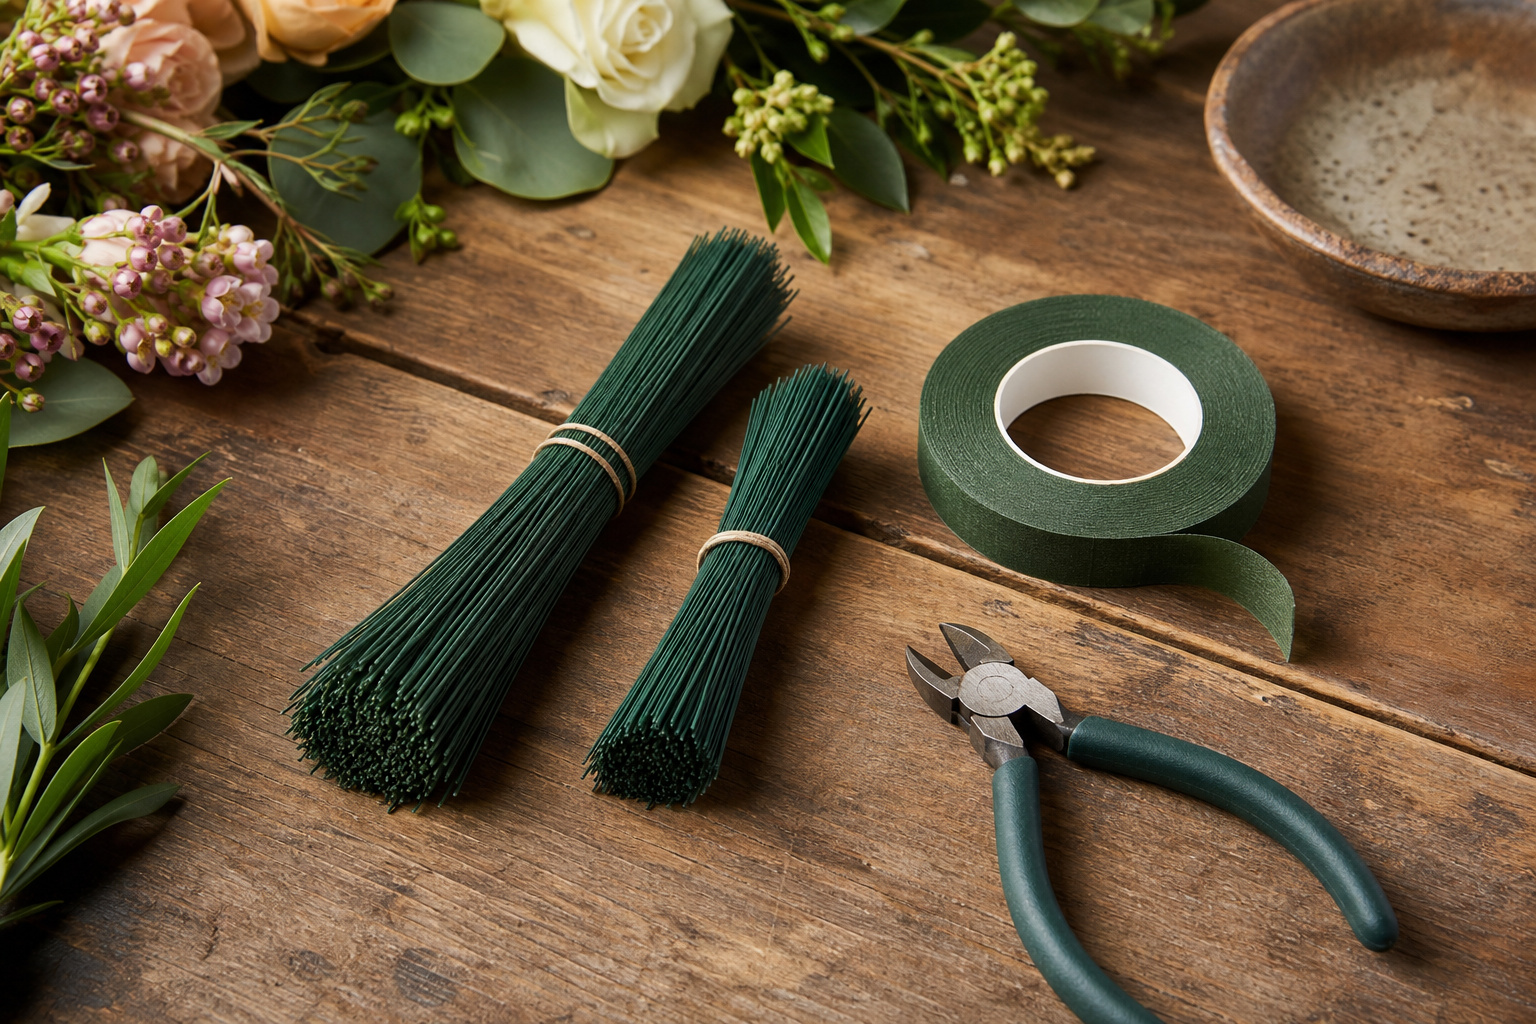
You don’t need a lot to get started, but you do need the right stuff. Paddle wire is fine for some applications, but for wiring individual flowers for corsages, cut wire in the right gauges is far more practical. It’s easier to handle, easier to control, cleaner results.
What I use in the shop: The floral wire, tape, and cutter kit is a solid starter package for under $15, which includes everything you need to begin. For ongoing work, I stock Oasis #22 green floral wire for standard corsage work and #26 for delicate flowers and accent materials.
Floratape is what I’ve used for years, and I haven’t had reason to switch. For cutters, don’t try to do this with scissors; see the floral tools post for what I’d actually recommend.
The kit is a good starting point for a one-time project. If you’re planning to wire flowers regularly, for prom season, a wedding, or just ongoing practice, buy the individual supplies in bulk. It’s cheaper, and you’ll always have the gauge you need on hand.
Avoid These Common Wiring Mistakes
The wire gauge is wrong for the flower. Too light and the head droops; too heavy and you’re fighting the wire every time you try to position it. Match the gauge to the bloom size.
The tape is applied too loosely. Floral tape has to be stretched slightly as you wrap. That’s how it bonds to itself. If you’re just wrapping without tension, it’ll slide off every time.
The natural stem is left too long. After wiring, trim the natural stem down short, an inch or less below the calyx, before you tape. Leaving a long stem adds unnecessary bulk and makes the finished piece harder to assemble and wear comfortably.
Wiring the flower too early. Wire your flowers as close to assembly time as possible. The more time passes, the more moisture the flower loses through the exposed end of the stem. If you’re doing a big batch, wire in stages and keep unwired stems in water until you’re ready.
Frequently Asked Questions
What wire gauge should I use for wiring roses for a corsage?
For standard roses, #22 wire is the right starting point. It’s heavy enough to support the bloom without being so stiff that it’s hard to work with. For miniature roses or spray roses, drop down to #24 or #26.
Can I use regular craft wire instead of floral wire?
You can in a pinch, but I wouldn’t. Craft wire doesn’t come in the right gauges for most floral work, and it’s often too stiff or too springy. Floral wire is designed specifically for this. It’s green, enamel-coated, so it blends with tape, and it has the right flex for positioning. It’s inexpensive enough that there’s no real reason to substitute.
Does wiring hurt the flower?
Done correctly, not really. You’re working quickly, and the flower doesn’t have time to react the way it would to a slow injury. The goal is to keep the flower in good condition through the event, and proper wiring and taping help do exactly that by slowing moisture loss.
What flowers are easiest to wire for beginners?
Carnations and alstroemeria are both forgiving and easy to work with. Carnations have a firm calyx that holds wire well, and alstroemeria individual florets are light enough that technique errors don’t cause immediate problems. Roses are slightly trickier but still very manageable once you’ve practiced the pierce method a few times.
How far in advance can I wire flowers for a corsage?
Ideally, wire and assemble the corsage no more than a day before the event. Store it in a plastic corsage box in the refrigerator overnight. The cooler slows the opening process and keeps the flowers firm. If you need to prep further in advance, wire the individual stems, keep them in water, and assemble the day before.
Do I need floral tape if I’m using a modern bracelet-style corsage base?
Yes, even with a glue-based or bracelet-style base, wiring and taping the individual flower stems first gives you much more control over positioning. It also reduces the amount of glue you need and keeps the finished piece looking cleaner. The tape step is worth it regardless of the assembly method you’re using.
Closing Thoughts
Wiring flowers is one of those skills that feels fiddly at first and then clicks. The woman who came in before her daughter’s prom left with a corsage she made herself; wired, taped, and assembled in about an hour. It wasn’t perfect, but it was hers, and it held up through the whole night. That’s what proper mechanics will do for you.
If you’re working on prom flowers or heading into wedding season and want to sharpen your floral design skills, getting comfortable with wire is the right place to start. Everything else, boutonnieres, flower crowns, wired bouquet components, builds on this foundation. And if you want to know more about what I keep on hand at the shop for fresh flower care and prep, that’s a good next read.
If you’ve tried wiring flowers yourself, I’d love to hear how it went. Drop a comment below and let me know which method clicked for you.
Til next time,