Disclosure: This post may contain affiliate links. If you click and buy, we may earn a commission at no extra cost to you. As an Amazon Associate, we earn from qualifying purchases.
Quick Summary: Making a prom corsage is easier than you think - and far cheaper than ordering one from a florist. This post walks through everything: the video tutorial, the exact flowers used, where to buy supplies, and pro tips to make yours look like it came from a professional shop. Budget: under $20.
Why Make Your Own Prom Corsage?
A corsage from a florist typically runs $35–$65, sometimes more, depending on the flowers and the market. Making your own with quality fresh flowers costs a fraction of that – usually $15–$25 total – and gives you complete control over the color, style, and size.
The secret is knowing that corsages don’t require lots of materials. You only need a small number of top-quality blooms, a few basic supplies, and a simple technique. The video below shows you exactly how to do it, even if you’ve never made a corsage before.
Watch: Prom Corsages! (DVFlora Tutorial)
This tutorial from DVFlora is one of the clearest corsage demonstrations I’ve come across. It covers the full process from start to finish, handles the most common beginner questions, and includes several insider tips that even caught me off guard.
It’s suitable for complete beginners and experienced designers alike. It’s simple, efficient, and surprisingly elegant when finished.
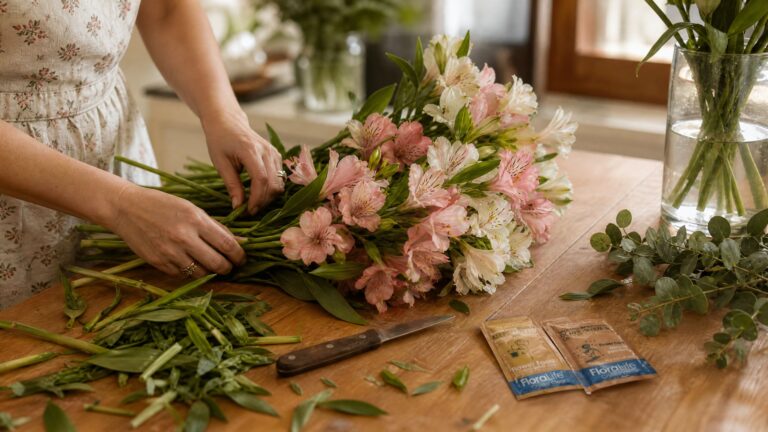
Flowers Used in This Corsage
The corsage in the video uses three flowers that are easy to find and affordable:
| Flower | Why It Works | Where to Find It |
|---|---|---|
| Spray roses | Delicate size, long vase life, wide color range | Local florist, grocery store floral department |
| Waxflower | Tiny star-shaped filler, holds up well when worn | Local florist |
| Plusmosa (Plumosa fern) | Soft, feathery texture – great for backing | Local florist, some grocery stores |
Since corsages use very few stems, often just 3–5 blooms total, this is one project where it pays to buy the best quality you can find. A single small bunch from a florist is more than enough.
Greg’s Take: I’m biased toward fresh flowers, but they genuinely make a difference here. The colors are richer, the texture is more lifelike, and the scent adds something a silk corsage just can’t. Buy fresh if you can.
Fresh vs. Silk Flowers: Which Should You Use?
Both work, but it depends on your priorities:
Fresh flowers give the most beautiful, lifelike result and are the professional standard. The downside is a short window: make the corsage 1–2 days in advance at most, and store it – refrigerated – until the moment it’s worn.
Silk flowers are a solid option if you’re making corsages well ahead of time, want to keep the corsage as a keepsake, or can’t find the right color in fresh blooms. Craft stores like Michaels and Hobby Lobby carry good selections, and your local florist may also be able to order silk flowers for you.
Pro Tip: If you go with silk flowers, use real fresh greens as your backing and filler. The contrast between silk blooms and living greenery makes the corsage look significantly more natural and polished.
Everything You’ll Need (With Affiliate Links)
You can build a complete corsage kit for well under $50. Most of these supplies will last through multiple projects.
Flowers & Greens
- Spray roses - buy fresh from your local florist or grocery store floral department.
- Waxflower - local florist
- Plumosa fern or other soft greens - local florist
(For silk alternatives:)
Corsage Supplies
- Oasis Floral Adhesive (Cold Glue) - The best glue for fresh flowers; refrigerator-safe
- Corsage Wristlet / Bracelet - Elastic or ribbon style; pick one that matches the dress
- Floral Wire #22 - For wiring individual blooms
- Green Floral Tape - Wraps and seals wired stems
- Corsage Pins - For pin-style corsages (optional if making wrist style)
- Uglu Adhesive Dashes - A safer, glue-free attachment alternative
- Ribbon (satin or sheer - For decorative loops and finishing
- Tube Squeezer / Roller - Prevents wasting corsage glue
Tools
New to floral tools? See our full guide: Essential Floral Tools Every DIY Designer Should Own
Step-by-Step Overview
The video covers the full process, but here’s a quick reference so you know what to expect:
Step 1 - Condition your flowers.
Cut stems at an angle and place in fresh water with floral preservative for several hours (or overnight) before you start. This extends their life significantly.
Step 2 - Wire each bloom individually.
Insert a piece of floral wire through the base of each flower head. This lets you position blooms precisely and gives the corsage structure.
Step 3 - Tape the wired stems.
Wrap each wired stem with floral tape, pulling it taut as you spiral downward. The tape activates with the heat of your fingers.
Step 4 - Build the corsage.
Start with your largest focal flower, then layer in the smaller blooms and greens around it. Use corsage glue to secure petals and greenery in place.
Step 5 - Attach to the wristlet.
Bind the assembled corsage to the wristlet using floral tape and/or Uglu adhesive strips. Trim any excess wire.
Step 6 - Add finishing touches.
Ribbon loops, beaded wire accents, or pearl picks can all be added at this stage for extra flair.
Step 7 - Refrigerate until it’s time.
Store in a plastic bag or covered box in the refrigerator. Do not freeze. Remove about 30 minutes before wearing to let it come to room temperature.
Pro Tips for a Professional Result
Match the wristlet to the dress, not just the flowers.
An elastic wristlet works for most dress styles, but a ribbon-tie wristlet can look more elegant with formal gowns. When in doubt, choose a neutral tone that doesn’t compete with the blooms.
Keep it small and balanced.
Prom corsages look best when they’re neat and compact, roughly the size of your palm. Bigger isn’t always better; an overstuffed corsage can look heavy and awkward on the wrist.
Use magnetic corsage and boutonniere magnets instead of pins whenever possible.
Corsage pins can snag or tear delicate dress fabrics. Corsage and boutonniere magnets hold just as well and eliminate that risk.
Don’t skip the refrigeration step.
Fresh flower corsages can wilt surprisingly fast in a warm room. Keep it cold right up until it’s worn.
FAQ: Prom Corsage Basics
How far in advance can I make a prom corsage?
Fresh flower corsages are best made 1–2 days ahead. Any earlier and the flowers may not hold up for the full event. Store in a sealed plastic bag in the refrigerator.
What size should a wrist corsage be?
A finished wrist corsage is typically 3–4 inches across - compact enough to be comfortable and move freely during dancing, but visible and beautiful in photos.
What flowers hold up best in a corsage?
Spray roses, orchids, alstroemeria, and mini carnations are all excellent choices. Gardenias and tulips are beautiful but fragile - better left to experienced designers.
Do I need to wire every flower?
Yes, for a wrist corsage. Wiring gives you full control over placement and ensures blooms don’t droop or fall during wear.
What’s the difference between a wrist corsage and a pin corsage?
A wrist corsage attaches to a bracelet and is worn on the wrist. A pin corsage is attached directly to clothing with corsage pins. Wrist corsages are far more popular today since they don’t risk damaging dresses.
Can I use hot glue instead of corsage glue?
Standard hot glue is not recommended for fresh flowers - it can damage petals and doesn’t hold up in the refrigerator. Use Oasis Floral Adhesive (cold glue) for fresh designs. For more details, see: Choosing the Right Floral Glue for Your Designs?
What if I can’t find the exact flowers in the video?
Substitute freely based on what’s available in the right color. Spray roses are the easiest to find in a wide range of colors. Ask your local florist – they can often source specific flowers with a few days’ notice.
How do I keep a corsage fresh during prom night?
Keep it refrigerated until 20–30 minutes before wearing. Once on, keep it out of direct heat and sunlight. A light mist of water from a spray bottle can help if the venue is very warm.
Next Step: Make the Wristlet Too
Don’t stop at the corsage - if you want the full polished look, check out our tutorial on wristlets:
? Learn To Make a Twisted Wire Wristlet Like a Professional?
It pairs perfectly with the corsage technique shown in the video above.
Final Thoughts
A prom corsage doesn’t have to be complicated or expensive. With fresh flowers from a local florist, a few inexpensive supplies from Amazon, and the technique shown in the DVFlora video, you can produce something genuinely beautiful for a fraction of what a florist charges.
The most important things: wire every bloom, use the right glue, and keep it cold until it’s time. Do those three things, and you’ll be thrilled with the result.
Want More How-to Articles Like This?
If so, sign up and I’ll let you know whenever I add or update anything.
Loved this tutorial? Pin it for later or share it with someone who’s planning for prom!
Have questions about a specific flower or color combination? Drop a comment on social media. I’m happy to help.
Til next time,