Disclosure: This post may contain affiliate links. If you click and buy, we may earn a commission at no extra cost to you. As an Amazon Associate, we earn from qualifying purchases.
Last Updated: June 9, 2026
A bride came in last spring with her phone out, showing me a bouquet she’d saved on Pinterest. Lush, blowsy garden roses stacked tight, a little acacia trailing off one side, the whole romantic thing. She wanted to make it herself and asked if it was actually doable.
I told her yes - but only if she handled the flowers right beforehand. That’s where most DIY bouquets fall apart. Not in the assembling. In the prep.
Garden roses are the most requested wedding flower I see at the shop, and they’re worth every penny when they’re handled properly. Here’s what you need to know to pull this off.
Choose the Right Garden Rose Variety
Not all garden roses are the same, and the variety you choose will affect everything: petal count, fragrance, and how long they hold up out of water on your wedding day.
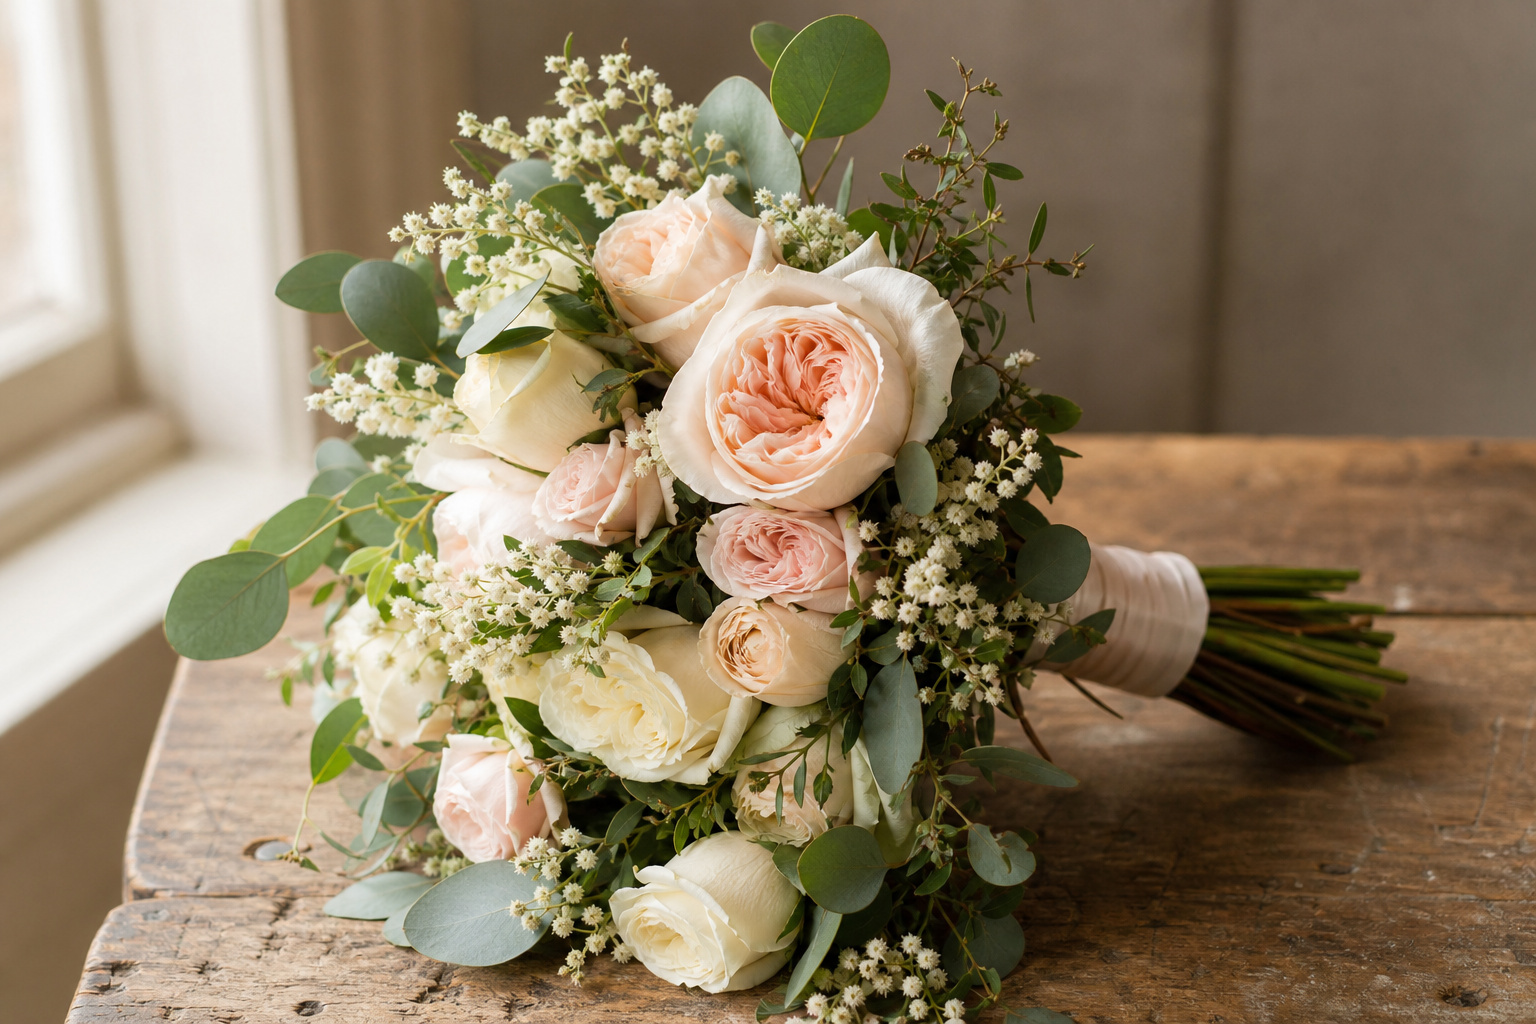
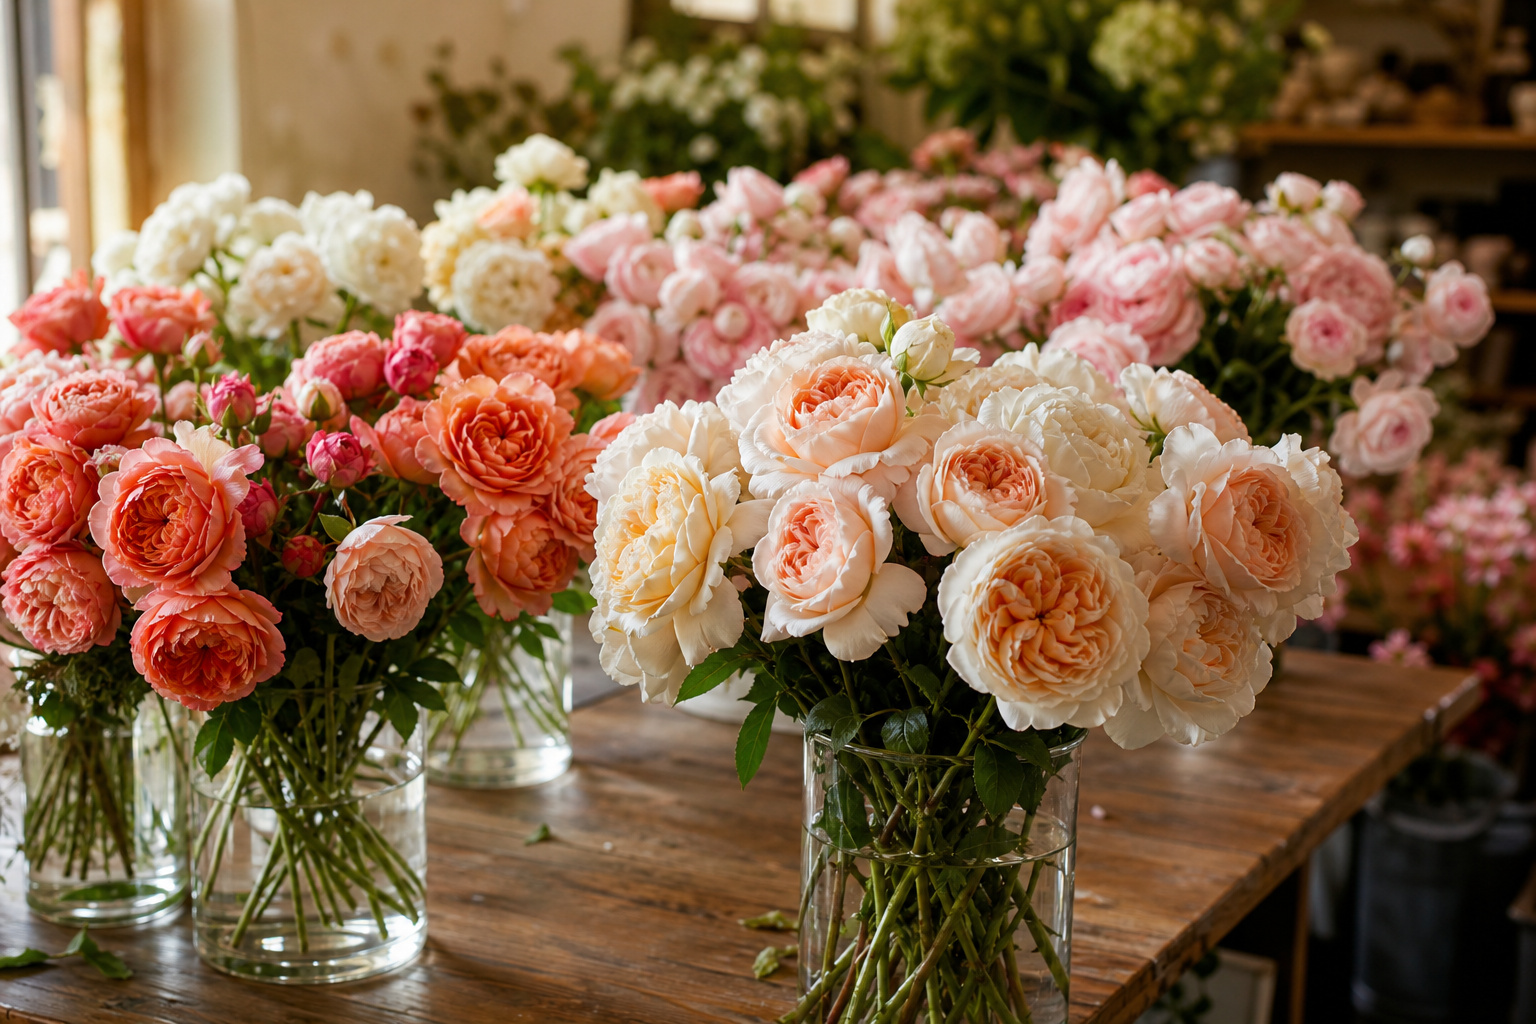
David Austin roses are the go-to for bridal work. They have that full, cupped bloom with layers of petals that photograph beautifully and hold their shape well. Juliet, Keira, and Patience are varieties I see brides request most. Cabbage roses (also called centifolia) are another solid choice for a very full, fragrant, old-world look.
What I’d steer you away from for a DIY bouquet: any variety described as very large or very open at the stem stage. Those can blow open fast once they’re out of water, and that’s not what you want on a wedding morning.
If you’re sourcing online, buying in bulk from a reputable source is the way to go for volume. Sites like FlowerExplosion, BloomsbytheBox, and GlobalRose are the three I’ve personally experienced and can stand behind.
Order Early and Time Your Delivery Right
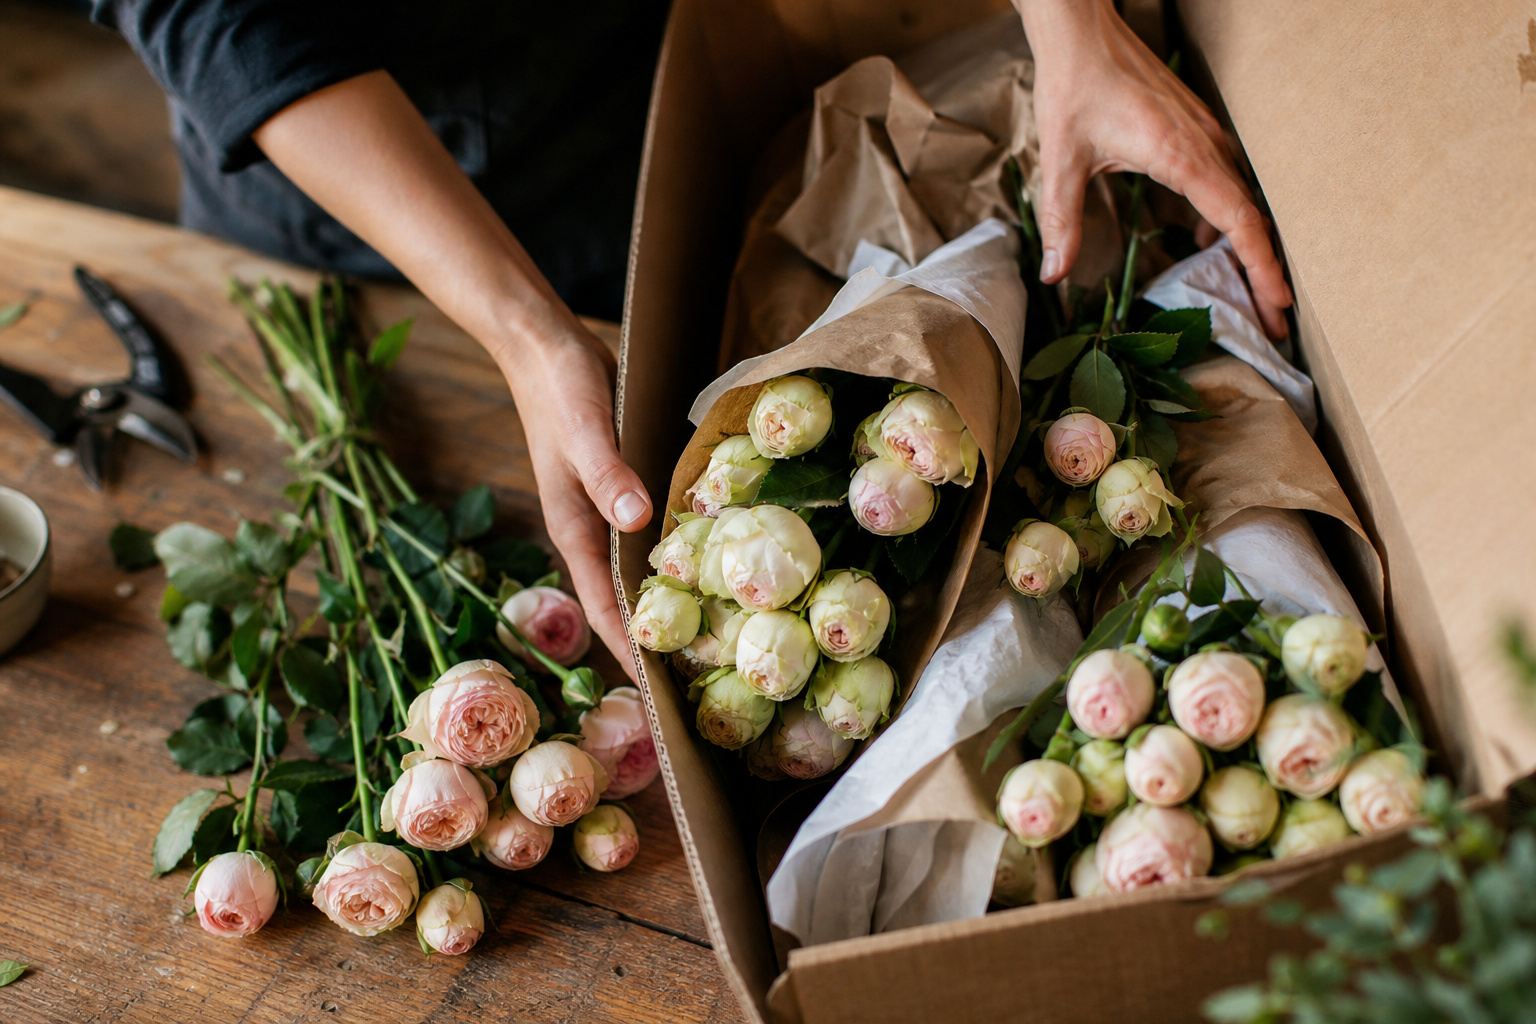
This is where most DIY brides get into trouble. They ordered flowers for delivery the day before the wedding. That doesn’t give you any margin.
Order for delivery three to four days before your event. Garden roses ship tight. That’s intentional. The blooms need time to open to their best, and that process takes a couple of days under the right conditions.
If you’re working with a peony alongside your garden roses, read up on peony timing specifically. They have their own quirks and a shorter window than most brides expect.
Late spring through early fall is peak season for garden roses. Outside that window, they’re available but pricier, and quality can be less consistent depending on the source.
Process Your Flowers Before You Do Anything Else

When your box arrives, don’t just set it on the counter and admire it. Get those stems in water within an hour of delivery.
Here’s the sequence I use:
- Unpack immediately and remove any damaged outer petals.
- Fill a clean bucket with cool water and flower food.
- Cut each stem at a 45-degree angle, about an inch off the bottom, using sharp floral scissors or a clean knife. Cut the stem underwater if you can, but at a minimum, cut it right before you drop the stem into the bucket.
- Strip all leaves that would sit below the waterline. Leaves in water rot fast and contaminate the whole bucket.
- Move the bucket to the coolest room in your house, away from sunlight, heating vents, and fruit bowls. Ethylene gas from ripening fruit is a real enemy of fresh flowers.
Let them drink for at least 24 hours before you arrange anything. Longer is better. Proper flower processing is what separates a bouquet that looks great at the ceremony from one that looks tired by the reception.
What I use in the shop: Floralife flower food is my standard. It’s what we’ve used for years, it works, and it’s easy to find. A packet per bucket, fresh water, that’s it.
Gather Your Supplies Before You Start Designing
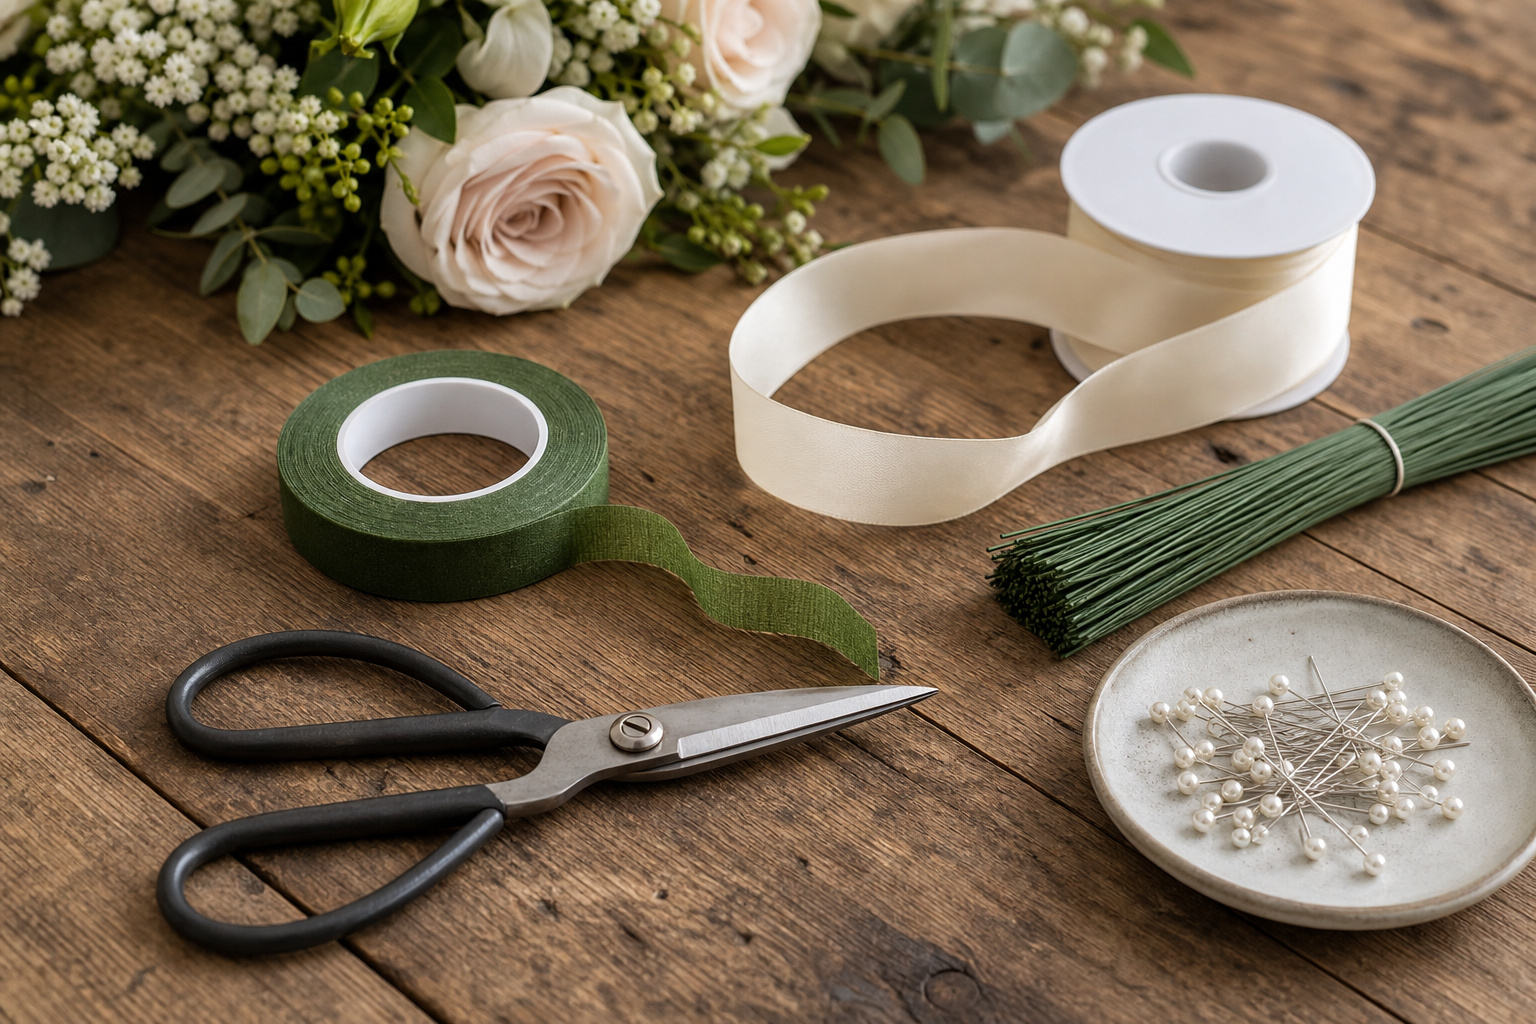
Don’t make the mistake of starting to arrange and then realizing mid-bouquet that you don’t have floral tape. Ask me how I know that’s a problem.
Here’s what you need on the table before you pick up a single stem:
- Sharp floral scissors or snips
- Green floral tape (stretchy, self-adhesive - not regular tape)
- Floral wire (20 or 22 gauge)
- Ribbon for the stem wrap
- Pearl-headed pins to secure the ribbon
- A clean bucket of water to hold stems while you work
- Finishing spray (optional but worth having)
What I use in the shop: Chrysal Professional flower finishing spray is the one I’ve kept on hand for years. A light mist after you’ve finished the bouquet helps the blooms hold up through photos and the ceremony.
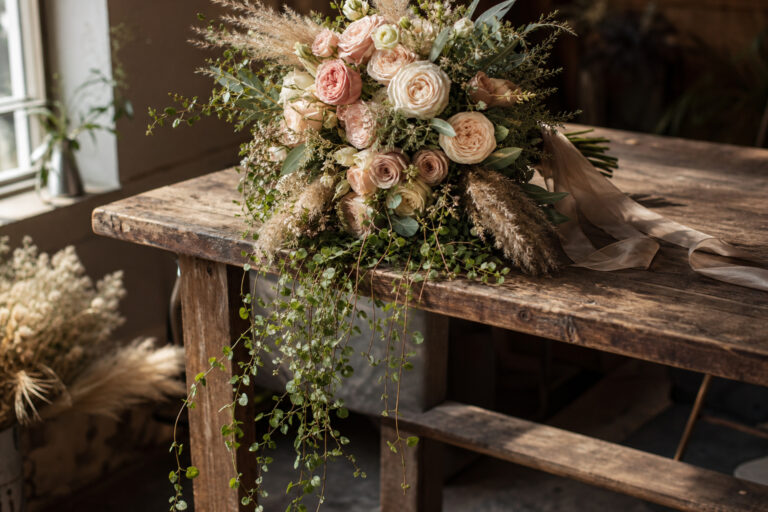
Assemble Your Bouquet Using the Spiral Stem Method
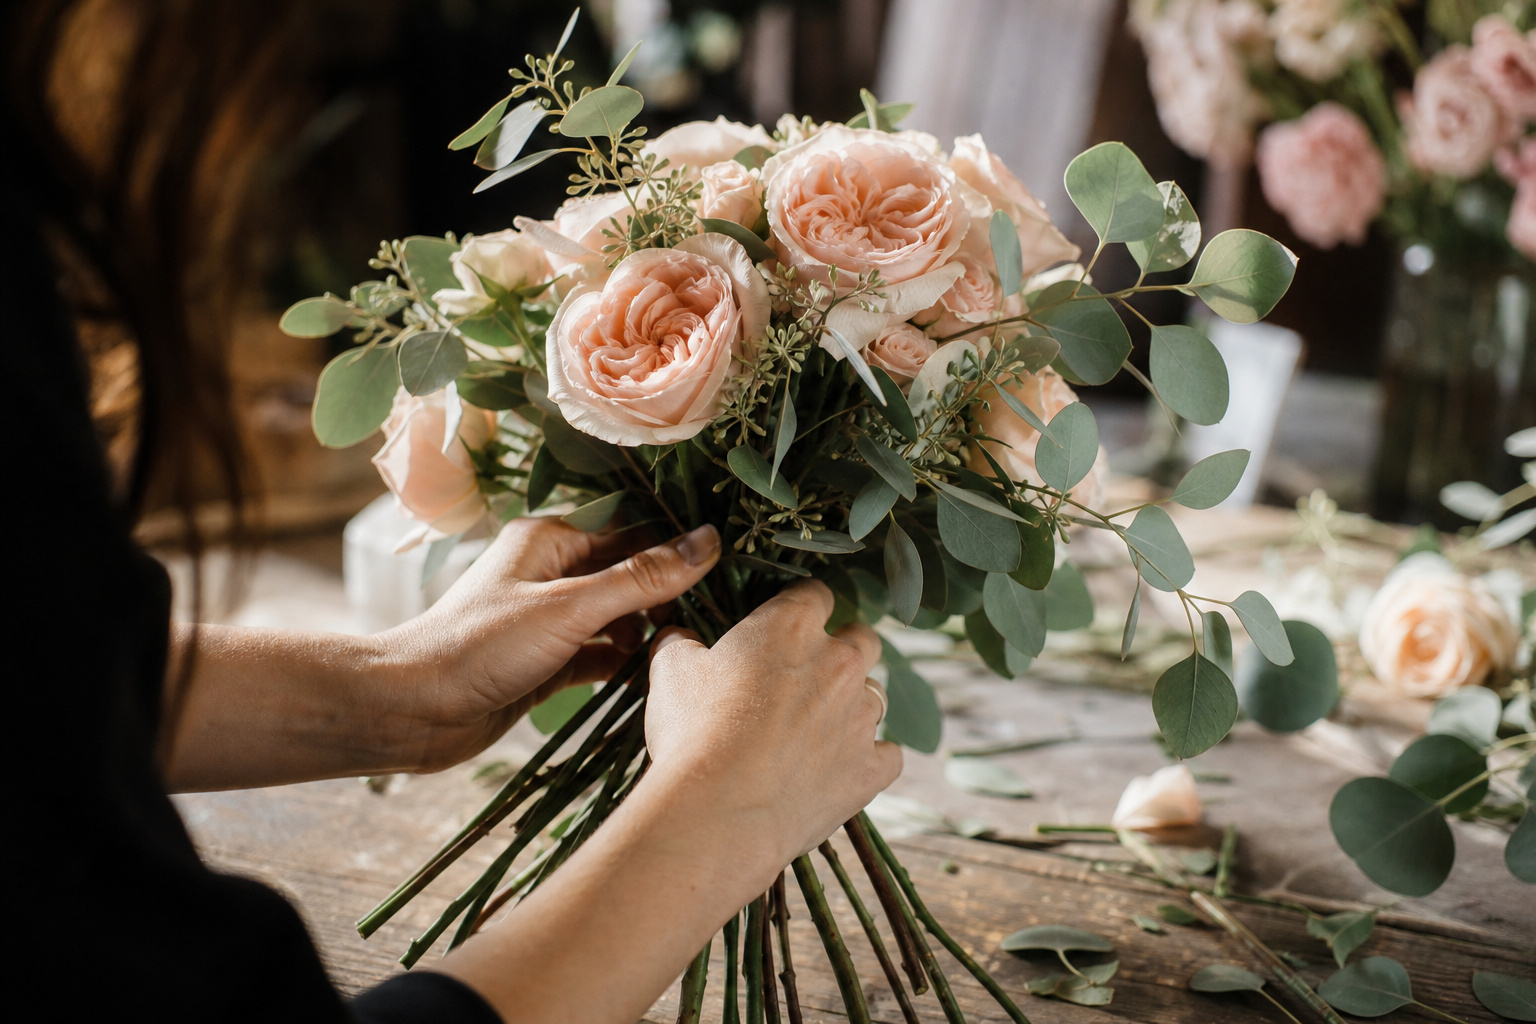
There’s a video below that walks through the full assembly process. I’d recommend watching it before you start, especially if this is your first hand-tied bouquet. It’s more useful to see it done than to read about it.
The method shown uses the spiral stem technique, which is what professional florists use for hand-tied bouquets. Every stem goes in at the same angle, which keeps the bouquet balanced and makes it easier to hold without the whole thing shifting on you.
The general assembly sequence:
- Start with 3–4 of your largest, most open garden roses as the center cluster.
- Add stems around the center, rotating the bouquet slightly with each addition and keeping all stems angling in the same direction.
- Tuck in your greenery (acacia, eucalyptus, dusty miller) as you go, in between roses, not all at the end.
- Once you have the shape you want, secure the stems with floral tape at the binding point (where your hand naturally grips).
- Trim the stems to an even length - about 8 to 10 inches works for most brides.
- Wrap the stem bundle with ribbon and pin it at the top and bottom with pearl-headed pins.
One thing the video does well: it shows you how loose and relaxed the garden style looks compared to a tightly packed round bouquet. Don’t fight it. That natural, slightly imperfect quality is exactly what makes garden rose bouquets special.
If you want to experiment with a less structured look, check out some of the boho bouquet ideas on the site. Many of them use garden roses as the anchor bloom with a wilder arrangement around them.
Keep the Bouquet Fresh Until the Ceremony
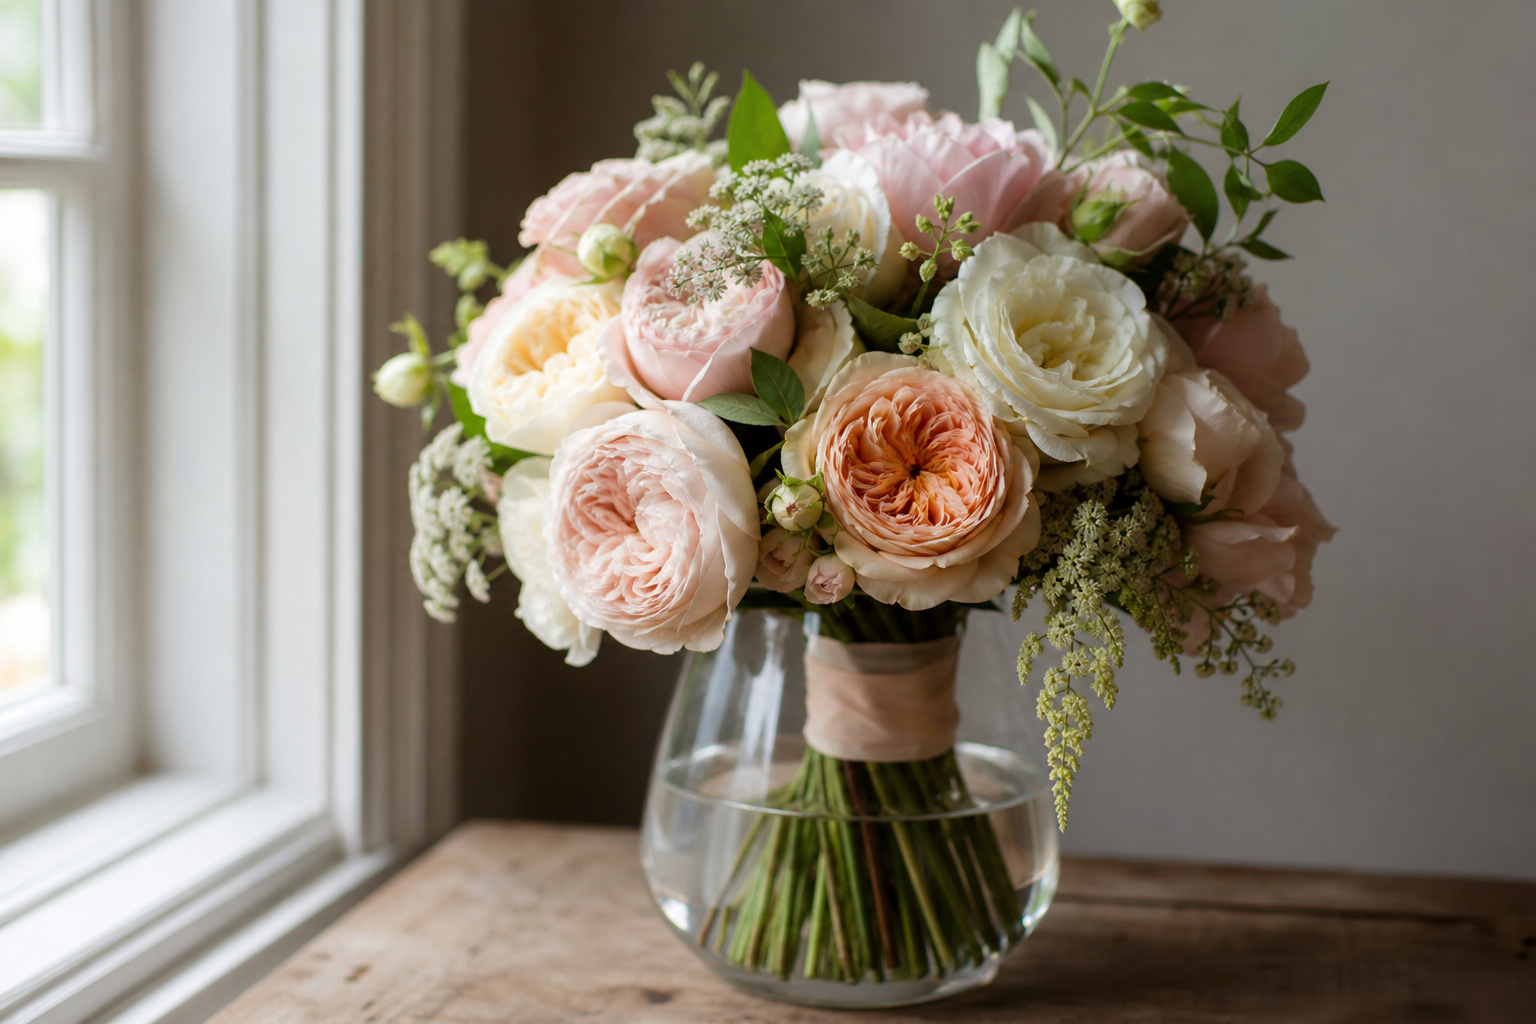
Once it’s assembled, keep the stems in water right up until you need it. I know that sounds obvious, but I’ve seen brides set a finished bouquet on a counter for two hours on a warm morning and wonder why it looks wilted in photos.
If you’re doing bridesmaid bouquets too, the same rule applies to all of them. A tall vase or a bucket works fine.
Day-of, pull the bouquet from water about 20–30 minutes before the ceremony, give it a light mist with your finishing spray, and blot the stems dry before handing it off. That’s enough time for the stems to stop dripping without the blooms starting to stress.
For summer weddings especially, timing matters. Garden roses don’t love heat. Summer wedding bouquet planning has its own considerations worth reading if your date falls between June and September.
Practice the Bouquet Before the Wedding
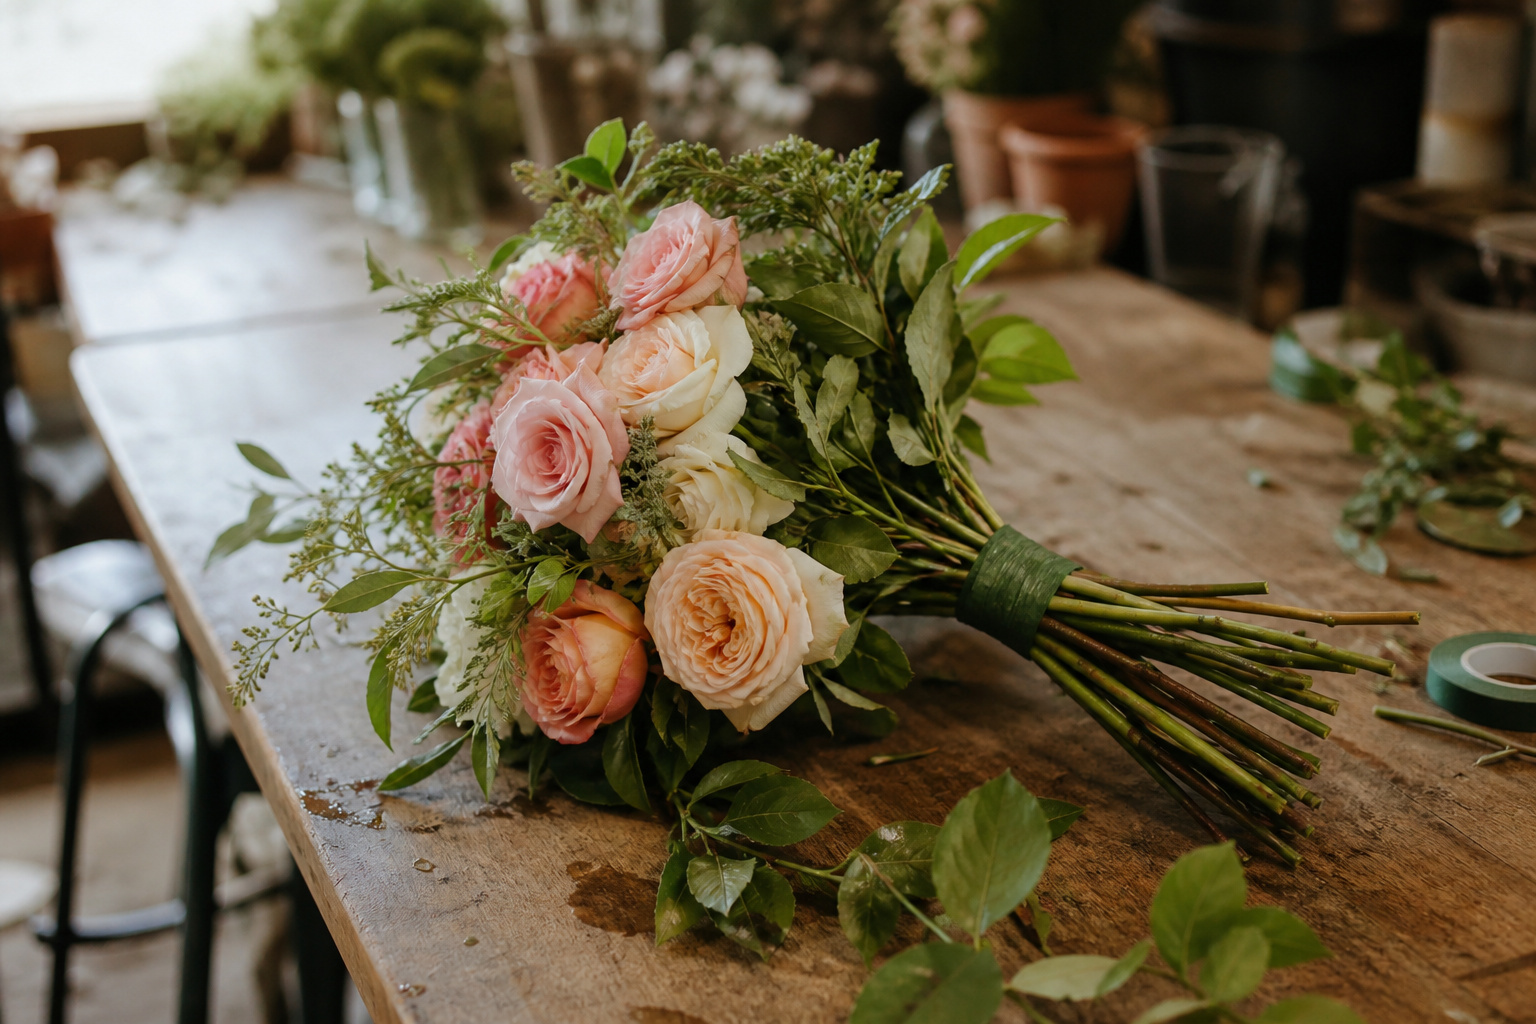
Do a practice run. It doesn’t have to be with garden roses; any similarly-sized flower will give you a feel for the mechanics. The goal is to get comfortable with the spiral technique before you’re working with expensive blooms the week of your wedding.
Most people find the first practice bouquet a bit lumpy or lopsided. That’s fine. The second one is noticeably better. By the time you’re working with your actual flowers, you’ll have the muscle memory, and you’ll be a lot less nervous about it.
If you want to understand the tools you’re working with before you start, that’s a good place to build some confidence, too.
Frequently Asked Questions
How many garden roses do I need for a bridal bouquet?
For a medium-sized hand-tied bouquet, plan on 20–30 stems depending on bloom size. David Austin roses are larger, and you’ll need fewer; smaller cabbage rose varieties may need more. Order a few extra; you want a cushion, not a perfect count.
When should I order garden roses for my wedding?
Order for delivery three to four days before your event. That gives the blooms time to open from bud stage to their best look, and gives you a day of margin if something goes wrong with the delivery.
Can I make the bouquet the night before the wedding?
You can, and in some ways it’s smart. You’re not rushing on the morning of. Keep the finished bouquet with stems in water overnight in a cool room. Pull it out 20–30 minutes before the ceremony and mist lightly.
Do garden roses need a bouquet holder, or are they hand-tied?
Either works, but hand-tied is the more natural choice for the loose, romantic garden style. A bouquet holder gives you more control if you’re new to arranging, but the spiral hand-tied technique in the video is achievable with a little practice.
What greenery works best with garden roses?
Acacia and eucalyptus are the classics. They’re soft, flexible, and complement the romantic quality of garden roses without competing with them. Dusty Miller adds a silvery texture that photographs well. Avoid anything stiff or structured; it fights the style you’re going for.
Are garden roses more expensive than regular roses?
Yes, noticeably. Garden roses have more petals, shorter stems, and a shorter vase life than standard hybrid tea roses, which makes them more labor-intensive to grow and ship. That said, you need fewer stems to fill a bouquet because each bloom is so much larger. The cost per stem is higher, but the cost per bouquet is often closer than people expect.
Closing Thoughts
A garden rose bouquet done right is one of those things that photographs beautifully and holds up throughout a long wedding day. The key is getting ahead of it, ordering with enough lead time, processing properly when the flowers arrive, and giving yourself a practice run before the real thing.
It’s genuinely one of the more satisfying DIY projects a bride can take on. Garden roses reward the prep work in a way not every flower does. Give them the right conditions, and they’ll bloom into exactly what you saw on Pinterest.
If you’ve made a garden rose bouquet for your own wedding or have questions about a variety I didn’t cover, drop a comment below. I read each one.
Til next time,